If you’ve ever wondered how brands produce those flawless product visuals — the ones where the lighting is perfect, every surface detail pops, and the image looks almost too good to be a photo — the answer is almost always 3D product rendering. It’s the process behind the majority of product imagery you see today, from e-commerce listings to billboard campaigns. And understanding how it works can completely change the way you think about product marketing.
This guide breaks down the full process, step by step. Whether you’re a brand manager trying to brief an agency, a product designer exploring your options, or someone thinking about building this capability in-house, you’ll come away with a clear picture of exactly what goes into creating a high-quality product render. We’ll also be honest about where the process gets tricky — because it does.
One thing worth noting upfront: creating professional-grade renders isn’t just about following steps. It’s about judgment — knowing when a model is detailed enough, when lighting feels right, when a material looks believable. That expertise takes time to develop. But knowing the workflow puts you in a much stronger position, whether you’re doing it yourself or working with a studio.
Why 3D Product Rendering Has Become the Standard

Traditional product photography still has its place. But for many businesses, it creates friction. You need a physical prototype. You need to book a shoot. If you want to change a color or swap a finish, you’re back to square one. The costs add up fast, and the turnaround is slow.
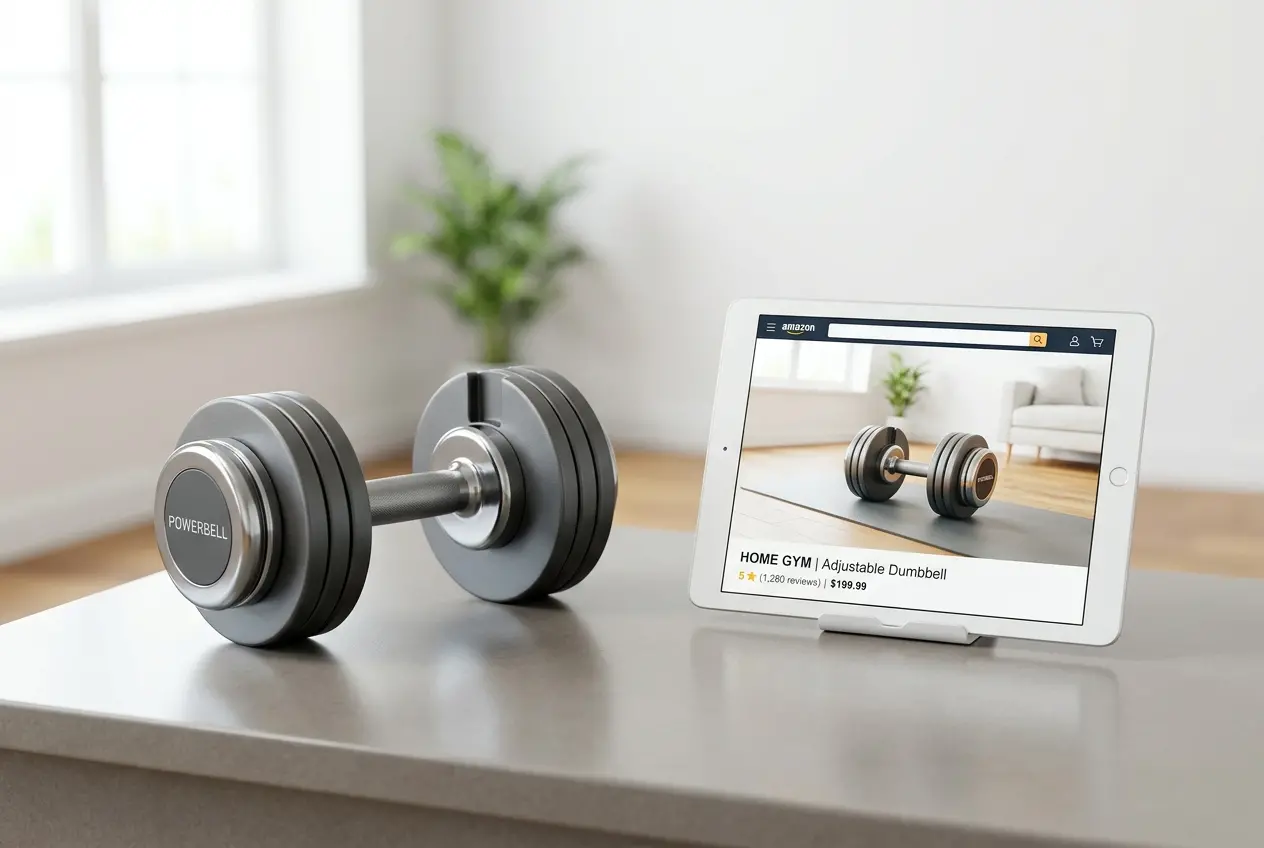
3D product rendering sidesteps most of those problems. Once a digital model exists, you can produce dozens of variations — different colors, environments, angles, even entirely different product configurations — without touching a physical object. For companies launching products pre-production, or managing large catalogs with frequent updates, that flexibility is genuinely valuable.
It’s also worth reading about 3D rendering vs photography which is better for product listings in 2025 if you’re still weighing both options. The comparison is more nuanced than most people expect.
Step 1: 3D Modeling — Building the Digital Product

Everything starts here. Before any rendering can happen, you need a 3D model — a precise digital representation of your product, built polygon by polygon.
Common tools include Blender, 3ds Max, Maya, Cinema 4D, and for engineering-led products, CAD software like SolidWorks or Fusion 360. If your manufacturer already works with CAD files, those are worth requesting. They’re often more accurate than building from scratch and can save significant time.
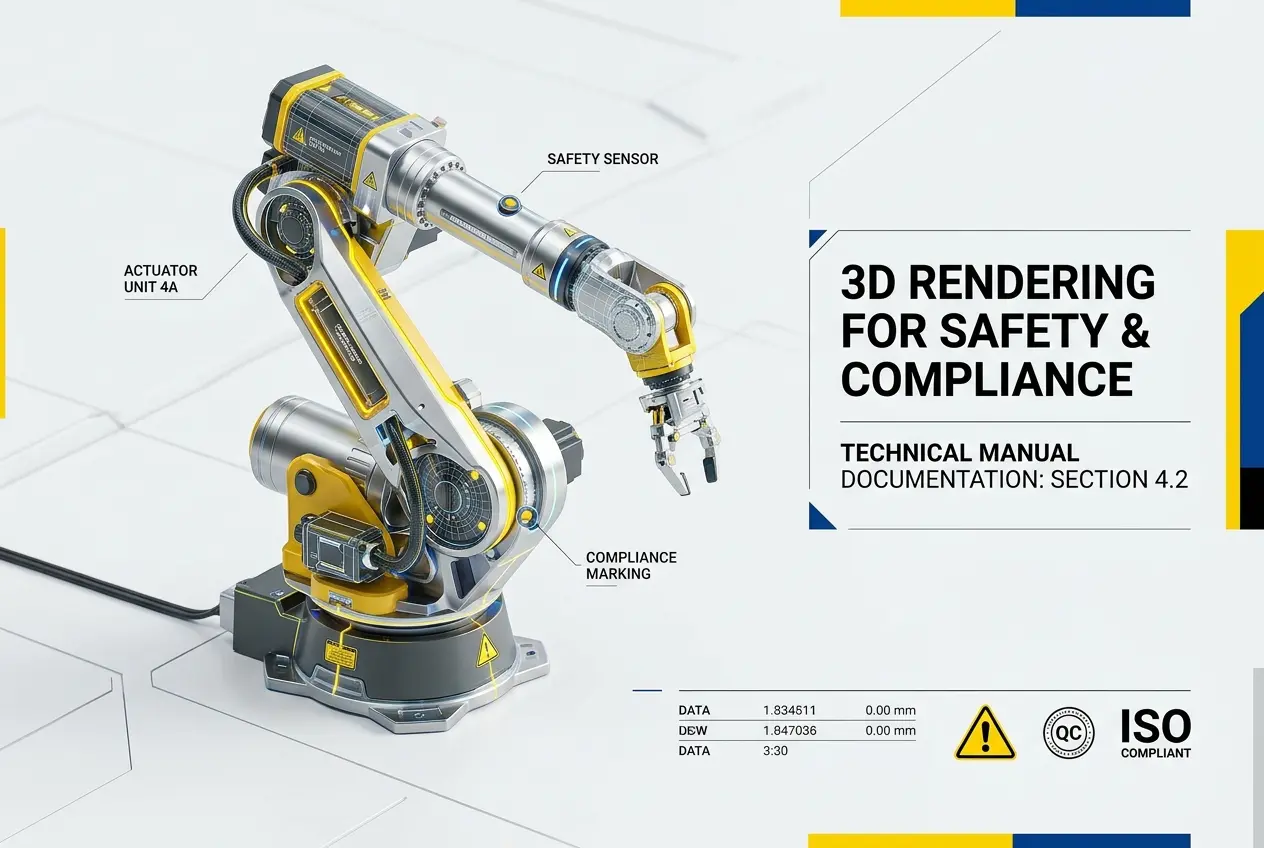
The quality of the model directly affects the quality of the final render. A poorly built mesh — with messy geometry, incorrect proportions, or missing details — will cause problems at every stage downstream. Clean topology matters. Accurate dimensions matter. Small surface details like embossed logos, thread patterns, or subtle curves matter more than people expect, because lighting will find and expose any inaccuracies.
For complex products, this is often the most time-consuming stage. A simple bottle might take a few hours to model properly. A piece of machinery or a detailed consumer electronic could take days. Understanding why 3D product modeling in rendering matters more than ever in 2025 and 2026 helps explain why this stage deserves the most attention.
Step 2: Materials and Texturing — Making Surfaces Look Real

A grey model sitting in empty space doesn’t tell anyone much. The next step is assigning materials — essentially telling the software what each surface is made of and how it should behave when light hits it.
Modern rendering relies heavily on PBR (Physically Based Rendering) materials. These simulate real-world surface properties: how rough or smooth a surface is, how much it reflects, how it scatters light. A matte plastic behaves differently from a glossy one. Metal reflects its environment. Glass refracts light and shows transparency. Fabric absorbs light and has micro-texture that catches highlights at specific angles.
Textures are image files that get mapped onto the 3D surface to add detail — things like wood grain, leather pores, fabric weave, or the subtle imperfections you’d find on a painted surface. These small details are what push a render from “that looks 3D” to “wait, is that a photograph?”
Getting materials right takes a good eye and access to quality texture libraries. Many studios maintain their own libraries of custom materials built and refined over years of work.
Step 3: Lighting — Where Renders Are Won or Lost
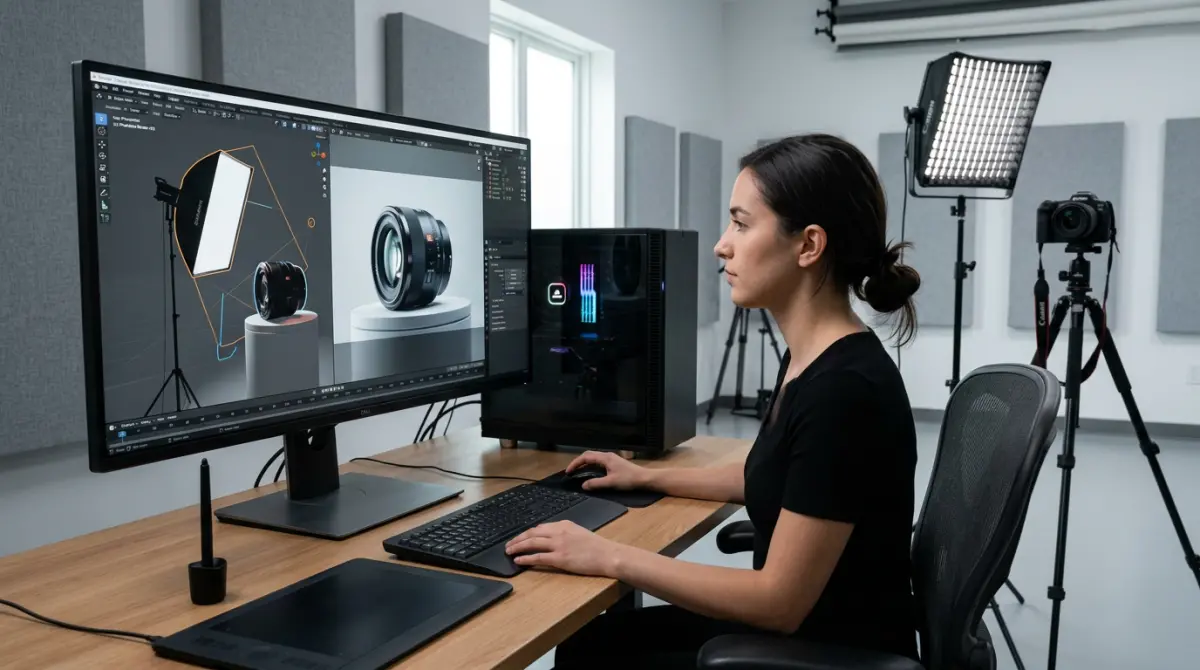
Ask any experienced renderer what separates average work from exceptional work and they’ll usually say lighting. It’s that important.
Lighting defines the mood of an image, reveals or hides surface detail, and determines whether a product looks premium or cheap. The classic approach for product rendering is three-point lighting: a key light for primary illumination, a fill light to soften shadows, and a rim light to separate the product from the background. But real-world lighting is more complex than that, and professional renders usually go further.
HDRI (High Dynamic Range Image) lighting uses panoramic photographs of real environments — studios, outdoor settings, industrial spaces — to illuminate the scene. This adds natural color variation and environmental reflections that make renders feel grounded in reality. It’s particularly effective for products with reflective surfaces.
For e-commerce and catalog work, clean studio lighting with soft, controlled shadows tends to work best. For lifestyle contexts, you want lighting that matches the environment. Getting those two things to feel consistent is part of the craft.
Step 4: Camera Setup and Composition
How you frame a product communicates a lot. A low angle can make something look monumental. A close-up detail shot builds confidence in quality. A three-quarter hero shot is a workhorse view that shows form and depth simultaneously.
In 3D software, cameras behave like real cameras. You can set focal length, aperture, and depth of field. Shallow depth of field — where the background blurs while the product stays sharp — is often used to direct attention and add a premium feel. Wider depth of field works better when you need every detail visible and sharp.
Composition rules from photography apply equally here. Rule of thirds, negative space, leading lines — these aren’t just photography concepts, they’re visual communication principles that apply to any image. A technically perfect render that’s poorly composed will still fall flat.
It’s also worth thinking about what angles your competitors use and where you can differentiate. Most brands have one or two standard views. Smart art direction means going beyond those.
Step 5: Rendering — Processing the Final Image
Once the scene is set — model, materials, lights, camera — you send it to the render engine. This is the computationally intensive step where the software calculates how light bounces around the scene and produces the final pixel output.
Popular render engines include V-Ray, Octane, Arnold, Redshift, and Blender’s native Cycles. Each has its strengths. Octane and Redshift are GPU-accelerated, meaning they use your graphics card rather than the CPU, which tends to be significantly faster for complex scenes. If you’re curious about hardware requirements, the best graphics cards for 3D rendering in 2026 is a useful resource.
Render times vary enormously. A simple product in a controlled studio setup might render in minutes. A complex scene with lots of transparent materials, reflective surfaces, and environmental lighting can take hours. Resolution matters too — web images can get away with 2K, but print and large-format work typically needs 4K or higher. Check out this guide on how to pick the best resolution for 3D rendering before setting your output specs.
Step 6: Post-Processing — The Final Layer
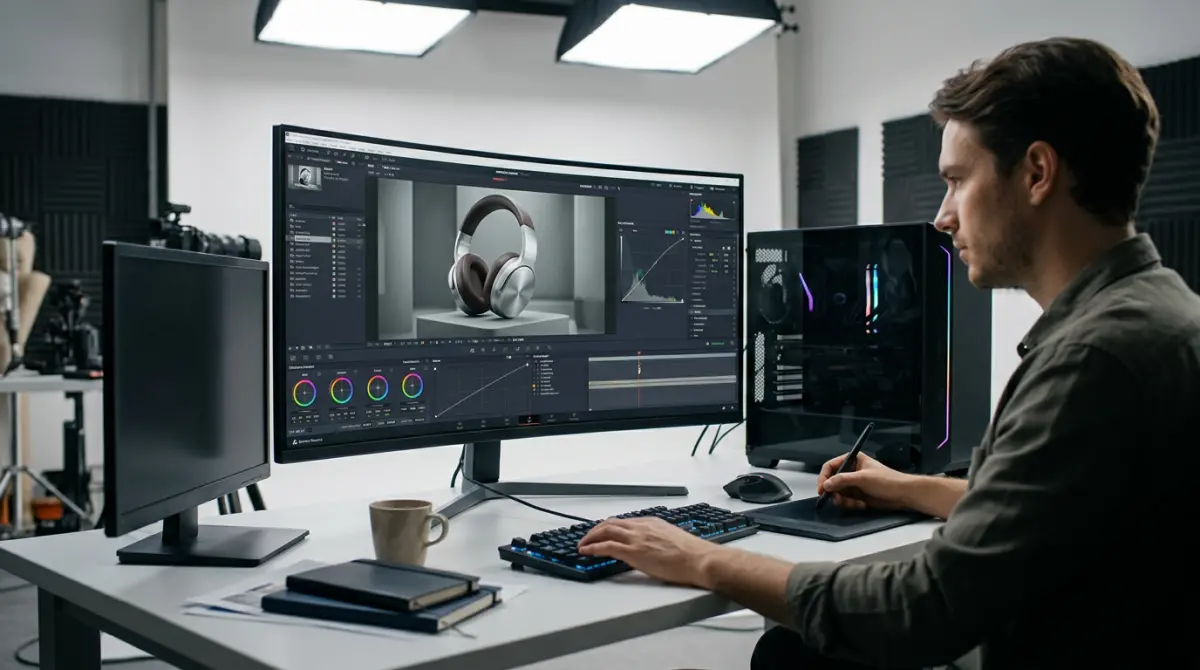
Almost every professional render goes through post-processing before it’s delivered. Even a technically excellent render benefits from color grading, contrast adjustments, and careful retouching in Photoshop or a comparable tool.
Post-processing lets you fine-tune the mood of an image, correct any minor artifacts from the rendering process, composite the product into backgrounds, and ensure consistency across a set of images. Brand colors sometimes shift slightly in rendering; post work is where you lock them in.
For some projects, this stage also involves adding shadows, reflections, or subtle environmental elements that are more efficiently done in compositing than in the 3D scene. It’s not cheating — it’s efficient production.
Step 7: Review, Feedback, and Iteration
The first pass is rarely the final version. A professional workflow always includes a structured review stage where the client or creative director checks materials, angles, lighting, and overall feel against the brief.
Good feedback is specific. “Make it look better” isn’t helpful. “The metal surface needs more reflection” or “the shadow is too harsh” gives the artist something to act on. If you’re working with an external studio, clear communication at this stage saves time and avoids rounds of unnecessary revision.
Most professional studios build revision rounds into their process. If you want to understand how studios approach this end-to-end, reading about what is a 3D product rendering studio and how do they deliver results gives useful context.
Practical Tips Before You Start
- Gather your references early. Before briefing anyone, collect reference images — renders you like, brand guidelines, material samples. The clearer your brief, the better the output.
- Request CAD files from your manufacturer. If a digital product file exists, use it. Building from scratch when accurate data exists wastes time and introduces errors.
- Think in sets, not single images. A single render is rarely what you need. Plan your full image set upfront — hero shots, detail shots, lifestyle contexts, color variants — and build the 3D model to support all of them.
- Don’t skip the lighting brief. Telling a renderer “make it look nice” leads to generic results. Reference specific lighting moods — soft and airy, dramatic and contrasty, warm and natural — to get something that fits your brand.
- Consider what comes after the still image. A 3D model built for renders can also be used for 360 product animation how spin renders boost e-commerce conversions or interactive experiences. If those are on your roadmap, plan the model accordingly from the start.
Should You Do This In-House or Work With a Studio?
This question comes up constantly. Building an in-house rendering capability gives you speed and control, but it requires investment in software, hardware, and skilled people who take time to develop. For businesses with high ongoing volume, it can make sense. For everyone else, working with a specialist studio is usually more cost-effective and produces better results faster.
The comparison isn’t always straightforward — it depends on your volume, product complexity, and how central visual content is to your business. The breakdown in this article on 3D render service vs in-house rendering which makes more sense for your business is worth reading before you make that call.
Ready to Start Creating?
3D product rendering is one of those capabilities that, once you have it working properly, changes how your whole team thinks about product visuals. No more waiting on photography schedules. No more expensive reshoots when something changes. Just clean, flexible, consistent imagery that scales with your catalog.
If you’re looking for a studio that handles this process end-to-end — from modeling through to delivered, production-ready images — our 3D product rendering services page covers what we do and the kinds of projects we work on. Or if you’re ready to talk specifics, contact us and we’ll help you figure out the right approach for your product and goals.
Frequently Asked Questions
What software is best for creating 3D product renderings for beginners?
Blender is the most popular free option for beginners creating 3D product renderings, offering powerful tools without any cost. For professionals seeking industry-standard results, Autodesk 3ds Max, Cinema 4D, and KeyShot are widely used due to their advanced rendering engines and material libraries. Choosing the right software depends on your budget, learning curve tolerance, and the complexity of the product you need to render.
How long does it take to create a professional 360-degree product rendering?
A basic 360-degree product rendering can take anywhere from a few hours to several days depending on the complexity of the product, the level of detail required, and the rendering software used. Simple objects with minimal textures may render in 2 to 8 hours, while highly detailed products with complex materials like chrome, glass, or fabric can take multiple days to complete. Render time also increases significantly with higher image resolution and the number of frames used in the 360-degree rotation sequence.
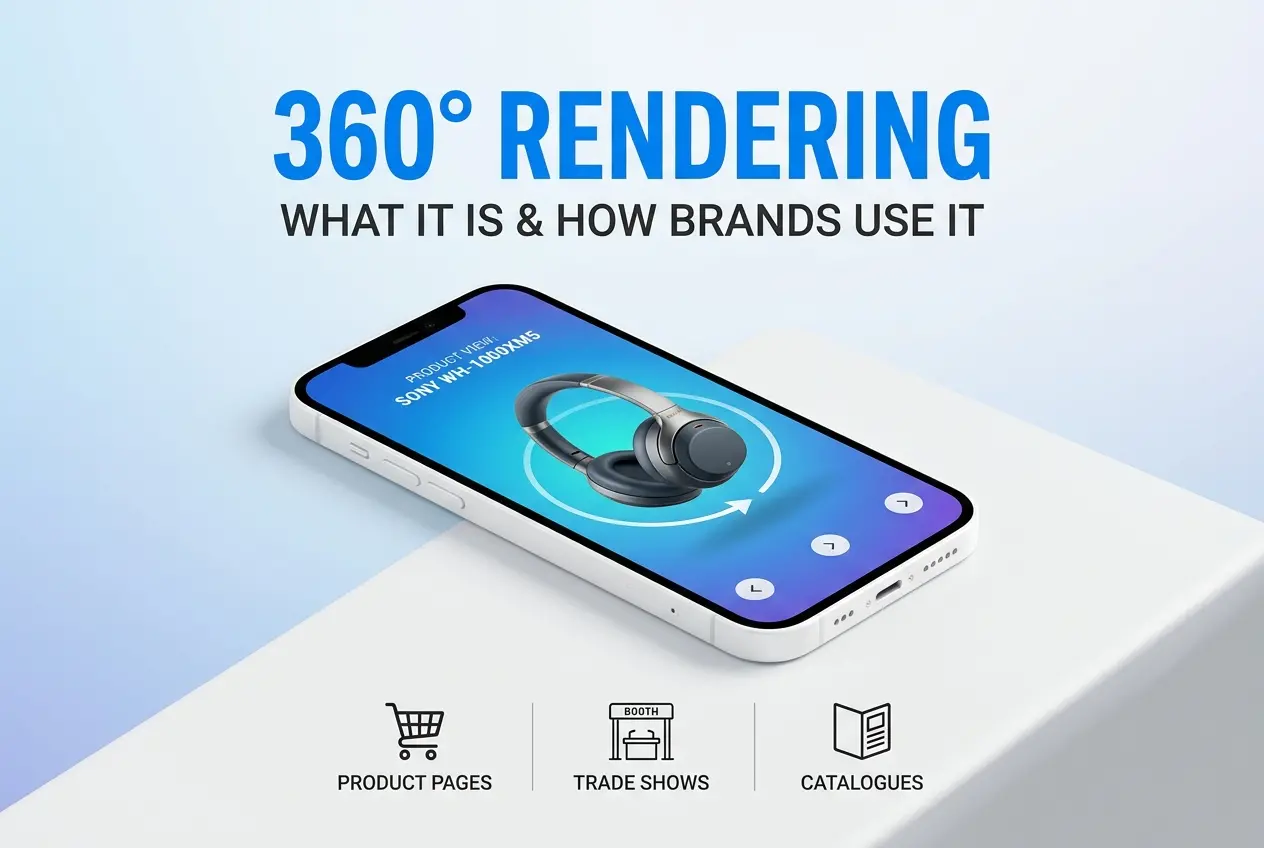
What is the difference between 3D product rendering and 360 product rendering?
A standard 3D product rendering produces a single static image of a product from one specific angle or perspective. A 360-degree product rendering, on the other hand, is a series of rendered frames captured at incremental angles around the product, typically compiled into an interactive rotating viewer or animation. The 360 format gives customers a complete view of the product from all sides, making it especially valuable for e-commerce and online retail applications.
How much does it cost to outsource 3D product rendering services?
The cost of outsourcing 3D product rendering services typically ranges from $50 to $500 per image for standard static renders, depending on product complexity, texture detail, and turnaround time. For a full 360-degree interactive product rendering, prices can range from $300 to over $2,000 per product, especially when high-resolution frames and interactive web integration are included. Factors like agency reputation, geographic location of the studio, and revision rounds also play a significant role in final pricing.
What file formats are used for 3D product renderings and 360 render outputs?
For static 3D product renderings, common output formats include PNG and JPEG for web use, while TIFF and EXR files are preferred for print-quality or post-processing workflows. For 360-degree product renders, individual frames are typically exported as PNG sequences and then compiled into formats like WebGL, HTML5 viewers, MP4 video, or GIF depending on the intended platform. Many e-commerce platforms such as Shopify and WooCommerce support embedded 360 viewers that accept these compiled formats for interactive product displays.