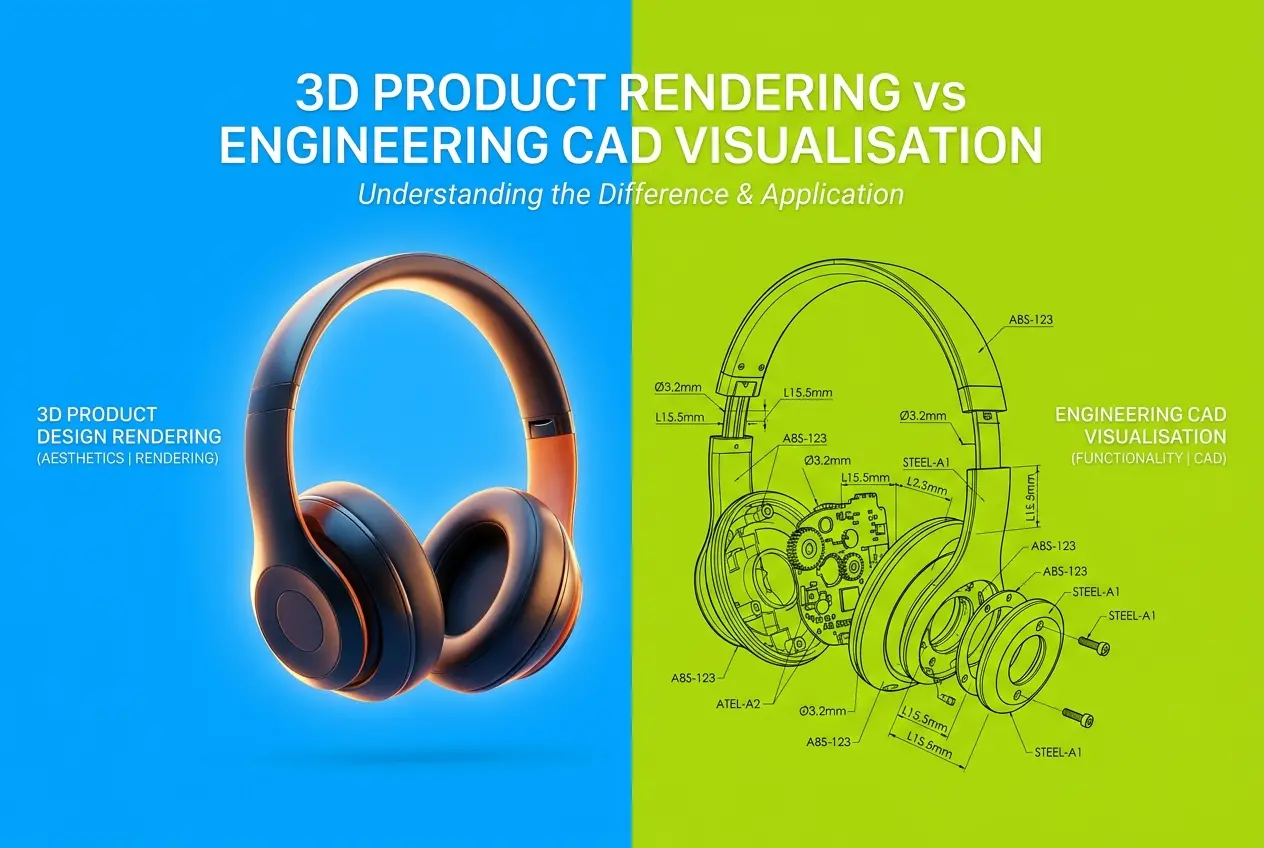
Send a CAD file to ten different people and ask for “a render,” and you’ll get ten different ideas of what that means. Some expect a glossy hero shot for a website. Others expect a cutaway showing tolerances and fastener positions. Both are legitimate, but they are not the same job. Understanding 3D Product Design Rendering vs Engineering CAD Visualisation: What Is the Difference and When Does Each One Apply saves you from paying for the wrong deliverable, or worse, using the wrong image in front of the wrong audience.
The short version: product design rendering sells and communicates a product’s look and feel. Engineering CAD visualisation explains how a product is built, fits together and functions. They often start from the same geometry, yet the way we treat that geometry is completely different.
In our studio, this distinction shapes everything from how we prepare the model to how we light it. Let’s walk through it properly.
What Engineering CAD Visualisation Actually Is
Engineering CAD visualisation is the visual output of a CAD environment such as SolidWorks, Creo, Inventor, CATIA or Fusion. Its purpose is technical communication. Think exploded assemblies, section views, clearance checks, motion studies, and colour-coded part identification for manuals and review meetings.
The geometry is precise and parametric. Every fillet, thread and bolt hole exists because it was designed to exist. Materials are usually basic: flat colours or simple shaders that separate one component from another. Lighting is neutral, and the camera is often orthographic or near it, because the viewer needs accurate proportions rather than drama.
The audience is typically engineers, manufacturers, quality teams, technicians and procurement staff. They are asking “Does this fit?”, “How do I assemble it?” and “Which part is that?” Beauty is irrelevant. Clarity is everything.
What 3D Product Design Rendering Is
Product design rendering is photorealistic or stylised imagery built to make people want, understand or trust a product. It shows how brushed aluminium catches a window light, how soft-touch plastic diffuses a highlight, how a stitched leather edge casts a tiny shadow.
Here the CAD model is only a starting point. We rebuild, clean and often re-topologise it, then add materials, textures, bevels, imperfections and a lighting setup. A real product has micro-bevels on every edge, because no manufactured edge is infinitely sharp. CAD often has perfectly sharp edges, and in a render those look wrong immediately. Our eyes catch the missing edge highlight even if we can’t explain why the image feels fake.
The audience is customers, investors, retail buyers, marketing teams and marketplace shoppers. They are asking “Do I want this?” and “Does this look premium?” If you need this kind of output, our 3D product rendering services are built around exactly that goal.
Side-by-Side: How the Two Approaches Differ
| Factor | Product Design Rendering | Engineering CAD Visualisation |
|---|---|---|
| Primary goal | Persuade, sell, inspire | Inform, verify, instruct |
| Audience | Customers, buyers, investors | Engineers, technicians, manufacturers |
| Geometry | Cleaned, bevelled, optimised for visuals | Exact, parametric, as-designed |
| Materials | Physically based, textured, detailed | Flat or simple colour coding |
| Lighting | Studio or environment, directional | Neutral, even, shadow-light |
| Camera | Perspective, hero angles, depth of field | Orthographic or technical angles |
| Typical outputs | Hero shots, lifestyle scenes, 360 spins, ads | Exploded views, sections, assembly steps, manuals |
| Accuracy priority | Perceptual realism | Dimensional truth |
Where the Two Overlap (and Where Confusion Starts)
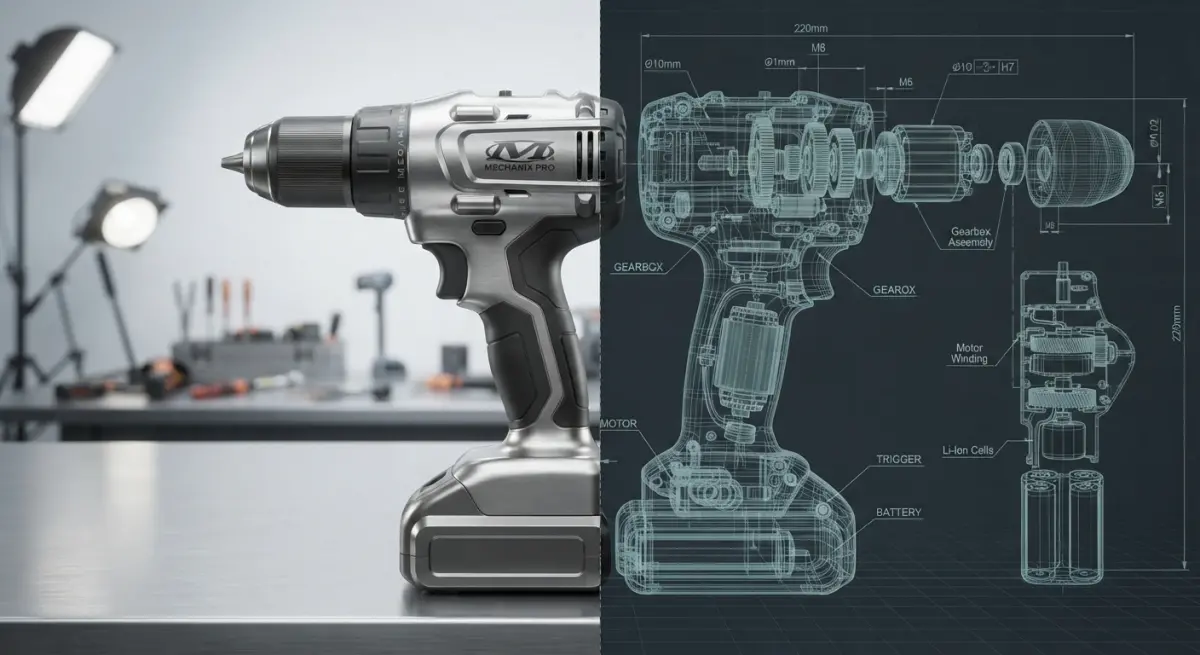
Plenty of projects sit in the middle. A manufacturer of industrial pumps may want a beautiful render for a trade catalogue and a clean exploded view for the service manual. Both come from the same CAD assembly, but they are two separate production paths.
Overlap also appears in the hybrid deliverable: a realistic exploded view. It shows components separated in space, but with real materials, proper lighting and visible finish. Marketing teams love these because they communicate engineering quality without feeling cold. Used on a product page, a well-made exploded render tells a buyer “this is built properly” in a single glance.
The confusion starts when someone expects the cheap, fast CAD screenshot to double as a marketing image. It rarely works. A viewport capture with default shading flags a product as unfinished, however good the engineering behind it.
When Each One Applies
Use engineering CAD visualisation when:
- You’re reviewing a design internally and need to check fit, access or clearance.
- You’re producing assembly instructions, service manuals or training material.
- You’re sending information to a manufacturer or supplier who needs to see part relationships.
- You need section views that reveal internal structure, such as channels, cavities or wall thickness.
- You’re preparing patent illustrations or technical documentation.
Use product design rendering when:
- You’re listing on Amazon, Shopify or any marketplace and need images that convert browsers into buyers.
- You’re pitching to investors or running a crowdfunding campaign for a product that doesn’t exist yet.
- You’re building a catalogue with many variants and don’t want to photograph every colourway.
- You’re showing a concept to a retail buyer before tooling is complete.
- You need lifestyle scenes, packaging shots or animation for advertising.
Pre-production is where rendering really earns its place. You can show a polished product before a single prototype is made, and test market reaction before committing to tooling.
Practical Observations: What Clients Get Wrong
After enough projects, patterns repeat. These are the ones we see most.
Assuming the CAD file is render-ready. It usually isn’t. Files can be extremely heavy, contain hidden internal parts, overlapping surfaces, missing fillets and inconsistent normals. A model that behaves perfectly in SolidWorks can fall apart when converted to a mesh. Part of our job is cleaning and rebuilding, and it’s time well spent rather than overhead.
Sending only a STEP file with no reference. Geometry tells us shape. It doesn’t tell us that the grip is a matte rubberised coating, or that the logo is laser-etched rather than printed. Without material references, we guess, and guessing leads to revision rounds. Even a few phone photos of a prototype or a finish sample make a big difference.
Over-detailing technical renders. The opposite mistake also happens. A client asks for a photorealistic exploded assembly for a maintenance manual, then discovers technicians can’t tell parts apart because the reflections and textures are fighting for attention. Technical communication often works better with restrained shading and deliberate colour coding.
Ignoring the real-world context. A product render on a pure white background is right for a marketplace listing. It’s often wrong for a brand website, where context sells the idea. Think about where the image will live before choosing the style.
Treating accuracy and realism as the same thing. A render can be dimensionally exact and still look artificial. Another can look convincing while a fillet is slightly off. When the stakes involve manufacturing, accuracy leads. When they involve sales, perception leads. Be clear which one you’re buying.
How We Approach the Workflow
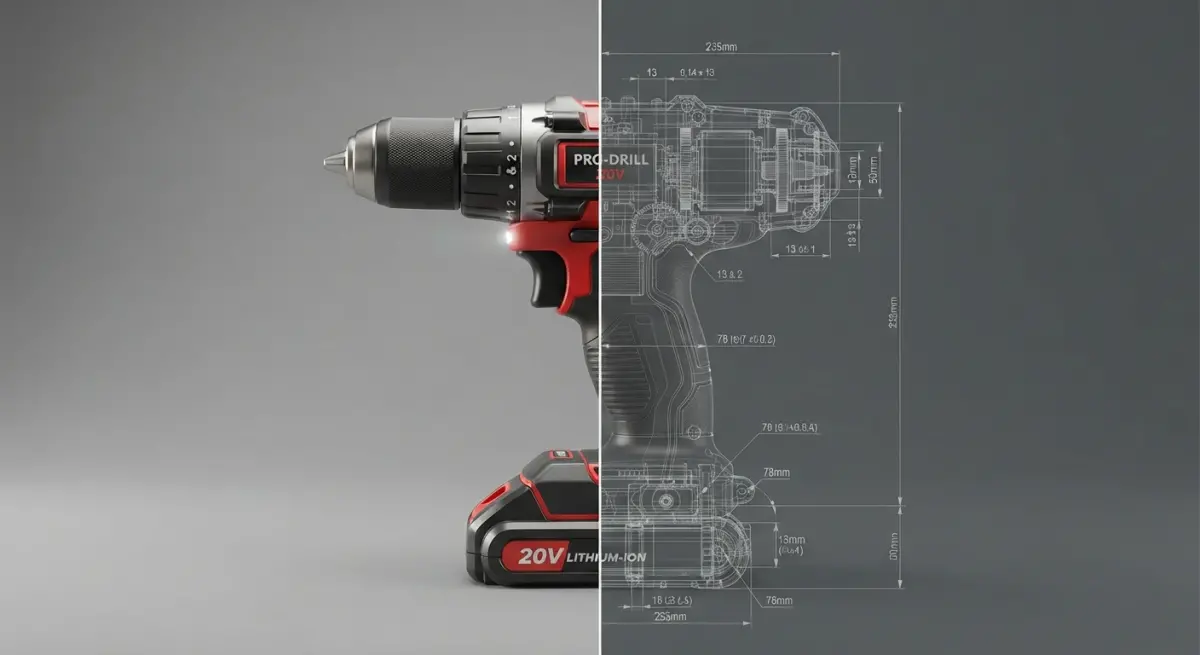
For rendering projects, we begin by assessing the incoming CAD: format, scale, assembly structure and whatever detail is missing. We then decide what to keep, what to simplify and what to rebuild. Hidden internal components usually go, because they cost render time and add nothing to the image. Hard edges get micro-bevels. Materials are built from references, not defaults.
For technical visualisation, we preserve exactness. We keep the assembly hierarchy, set clean camera angles, separate components along logical axes for exploded views and apply consistent colour logic. If the same model also needs a marketing version, we branch the project early so one deliverable doesn’t compromise the other. Our 3D product animation services are a natural extension of either path, whether you want an assembly sequence or a showcase spin.
Choosing the Right Approach for Your Project
Ask yourself one question: who needs to understand this image, and what should they do afterwards? If the answer is “build it, fix it or approve it,” you want engineering visualisation. If it’s “buy it, back it or remember it,” you want product design rendering. If it’s both, plan two outputs from one source model and brief them separately.
The decision between 3D Product Design Rendering vs Engineering CAD Visualisation: What Is the Difference and When Does Each One Apply isn’t about which is better. It’s about matching the visual to the viewer. Get that right and every image does a clear job.
Ready to Get the Right Visuals for Your Product?
If you have a CAD model and aren’t sure which direction fits your goals, send it over and tell us who the audience is. We’ll recommend the right approach, flag any file issues early and quote accordingly. Explore our 3D product rendering services or contact our team to talk through your project.
Frequently Asked Questions
What is the main difference between 3D product design rendering and engineering CAD visualisation?
3D product design rendering focuses on creating photorealistic images that show how a product looks, with accurate materials, lighting, and textures, mainly for marketing, sales, and design approval. Engineering CAD visualisation focuses on geometric accuracy, dimensions, tolerances, and functionality, and is used to design, analyse, and manufacture the product. In short, rendering communicates appearance, while CAD defines how the product is built.
Can I use my engineering CAD files to create photorealistic product renders?
Yes, most rendering workflows start with CAD models exported in formats such as STEP, IGES, or STL, which are then imported into rendering software like KeyShot, Blender, or V-Ray. However, the CAD data usually needs cleanup, such as simplifying geometry, fixing surfaces, and removing internal components, before materials, lighting, and camera setups are applied. Doing so improves render speed and visual quality.
When should I use 3D product rendering instead of CAD visualisation?
Use 3D product rendering when you need visuals for e-commerce listings, crowdfunding campaigns, catalogues, investor presentations, or marketing before a physical prototype exists. It is also valuable for comparing colour and finish options with stakeholders. CAD visualisation is more appropriate during engineering stages, such as checking fit, assembly, clearances, and manufacturability.
Is CAD visualisation accurate enough for manufacturing and technical documentation?
Yes, CAD visualisation is built on precise parametric or solid models that carry exact dimensions, tolerances, and material data, making it suitable for manufacturing drawings, simulations, and assembly instructions. Standard CAD views, exploded diagrams, and cross-sections are commonly used in technical documentation. Photorealistic renders, by contrast, should not be relied upon for production because they may simplify or alter geometry for visual effect.
Which is more cost-effective for a new product launch: 3D rendering or CAD visualisation?
For launch marketing, 3D rendering is usually more cost-effective because it replaces expensive product photography and prototype shoots, and images can be easily updated when designs change. CAD visualisation is not an alternative but a required engineering step that you will likely already have completed. The most efficient approach is to reuse your CAD data as the foundation for rendering, so you avoid rebuilding models from scratch.