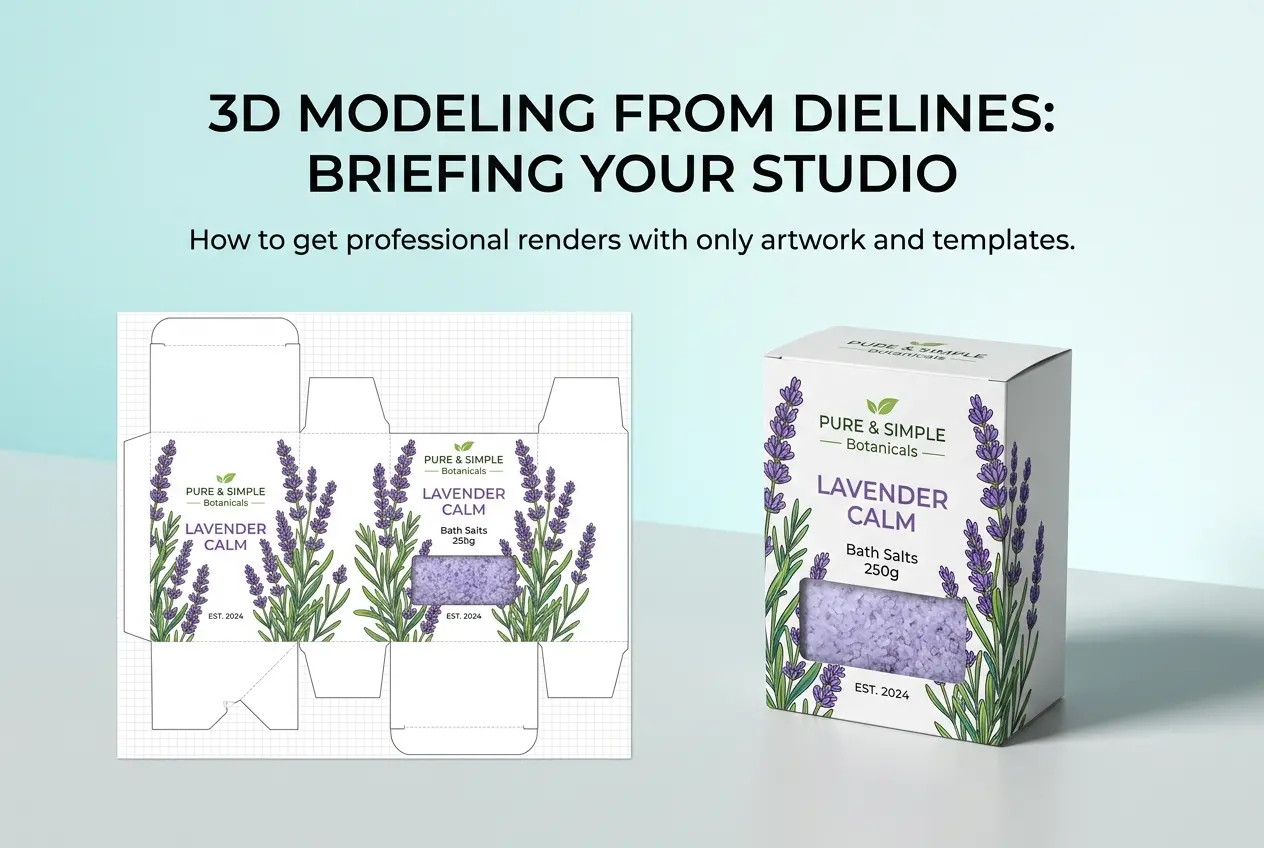
A client emails us a zip file with a dieline PDF and a folded, flattened AI file of their box artwork, then asks for “a few nice 3D shots for Amazon.” No product photos, no physical sample, sometimes not even a Pantone reference. This is one of the most common ways packaging rendering projects actually start, and it’s a perfectly workable brief — provided both sides understand what’s missing and how a studio fills the gap. 3D Product Modeling and Rendering for Consumer Packaging: How to Brief a Studio When You Only Have Dielines and Artwork is really a conversation about translation: turning flat print-ready files into a dimensional object that looks like it came off a shelf, without guessing wrong on the details that matter.
The tricky part isn’t the rendering itself. Any competent studio can light a box and make it look glossy. The tricky part is reconstructing physical truth — thickness, fold behavior, material finish, how artwork wraps around a curve — from files that were never meant to carry that information. Dielines tell a machine where to cut and fold. Artwork tells a printer what ink goes where. Neither tells us how the finished object will actually behave in 3D space. That’s the artist’s job, and it’s a lot easier when the brief anticipates the questions before we have to ask them.
What Dielines and Artwork Actually Give Us — and What They Don’t
A dieline is a 2D vector drawing showing cut lines, fold lines, and glue flaps. It’s precise about geometry in the flat state but says nothing about material behavior once folded. A box with sharp 90-degree corners on the dieline might round out slightly at the edges once real board takes a crease — something we account for during modeling so the render doesn’t look like a CAD wireframe.
The artwork file, usually a layered PDF or AI file, gives us the print design: logos, color blocks, typography, barcodes, nutritional panels. What it usually doesn’t give us is bleed accuracy at fold lines, varnish or foil placement as a separate readable layer, or any indication of substrate — is this coated paperboard, kraft, corrugated, a shrink sleeve on a bottle? Each of those reflects and absorbs light differently, and that’s most of what makes a render look convincing or fake.
Here’s a quick breakdown of what each file type typically covers, and where the gap sits:
| File Type | What It Tells Us | What It Doesn’t Tell Us |
|---|---|---|
| Dieline | Cut/fold geometry, panel dimensions, glue flaps | Corner rounding, board thickness, fold rigidity |
| Flat Artwork (AI/PDF) | Print design, color values, layout | Foil/spot varnish separation, substrate texture, sheen |
| Neither | — | Material finish, real-world scale reference, structural tolerances |
The Questions Worth Answering Before You Send the Files
We’ve found that a five-minute conversation upfront saves two rounds of revisions later. Before we open the dieline, we want to know a few things that clients often assume are obvious but aren’t visible in the artwork at all.
- Substrate and finish: Is it matte laminate, gloss laminate, soft-touch coating, uncoated kraft, or metallic foil board? Each has a distinct light response we build into the shader.
- Special print effects: Spot UV, foil stamping, embossing, or debossing need to be called out as separate layers or at least flagged in a note. If they’re baked into the flat artwork with no separation, we can’t recreate them — we can only guess.
- Structural type: Is this a straight tuck-end carton, a rigid two-piece box, a pouch, a bottle with a separate label, a blister pack? The dieline usually implies this, but confirming it avoids a wrong assumption early in modeling.
- Physical reference: Even a phone photo of a similar box on a shelf, or a competitor’s product, helps us judge how much give the material has, how it sits under its own weight, and how reflective it should look.
- Scale: Dielines often omit a stated unit or get exported without a scale reference. A box that’s supposed to be 90mm tall rendered at 900mm produces subtly wrong perspective and shadow falloff even if nobody can say exactly why it looks off.
Turning a Flat Dieline Into an Accurate 3D Model
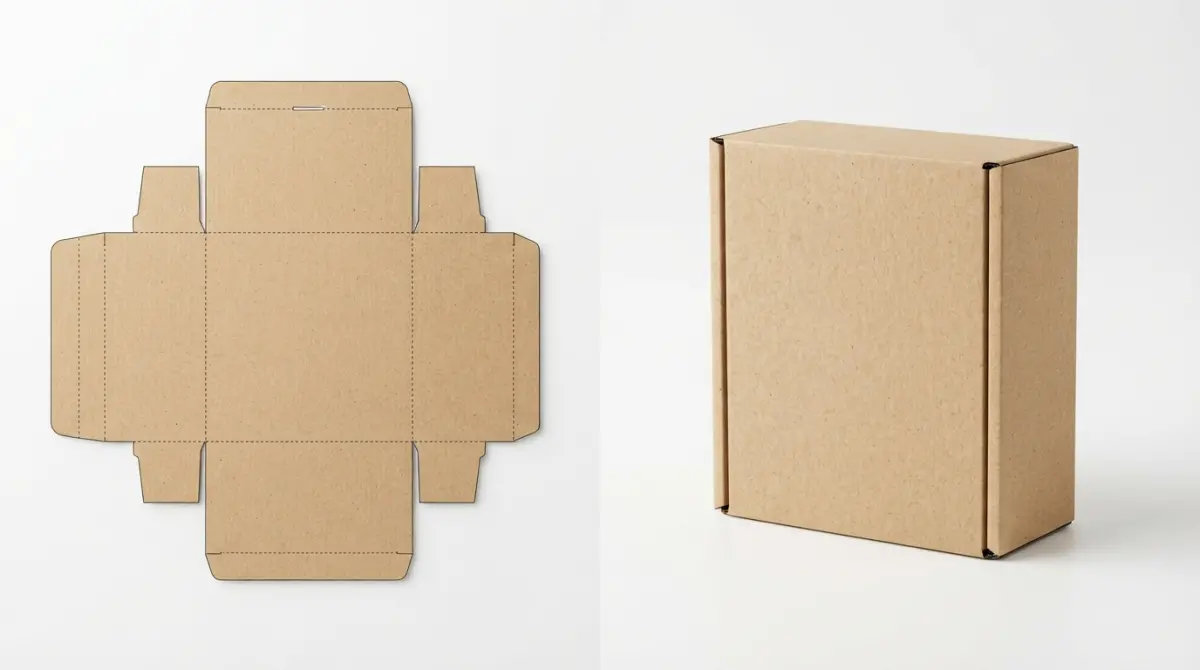
Once we have the file and the missing context filled in, the modeling process itself follows a fairly disciplined sequence. We import the dieline as a reference plane, trace the true panel geometry, and build a low-distortion 3D mesh with fold lines placed exactly where the dieline indicates. This matters more than people expect — if a fold is even a couple of degrees off from where the artwork was designed to bend, text near that edge will look stretched or misaligned in the final render.
Board thickness gets added next. Flat dielines are effectively zero-thickness diagrams, but real packaging has a caliper — thin for a paperboard carton, thicker for rigid gift boxes, negligible for a shrink sleeve. We model this thickness on cut edges and flap overlaps so the box doesn’t look like a paper cutout when viewed at an angle.
Then we UV-map the artwork onto the model, panel by panel, matching it precisely to the fold structure so nothing drifts across an edge. This is where separated layers for spot varnish or foil earn their keep — we apply those as distinct materials with their own reflectivity, rather than faking a shine with a lighting trick that won’t hold up under different camera angles.
Material and Lighting Decisions That Aren’t in the Files
This is the part of the brief that benefits most from an experienced eye, because it’s entirely inferred rather than specified. A soft-touch laminate needs a shader with low specular but a slight velvety falloff at grazing angles. Gloss laminate needs sharper, tighter highlights and visible environment reflection. Uncoated kraft needs micro-roughness and fiber texture so it doesn’t read as plastic. None of this exists in a print file — it exists in the artist’s understanding of how these materials behave in a photo studio.
Lighting follows the same logic used in 3D product rendering services generally: a large soft key light to establish form, a rim light to separate the product from the background, and a bounce card or fill to keep shadows from crushing to black. For packaging specifically, we pay close attention to how light grazes across embossed or debossed areas, since that’s often the one physical detail a dieline actually does confirm, and it’s an easy way to sell the realism of the render if it’s lit correctly.
Practical Section: What Actually Works, and Where Clients Trip Up
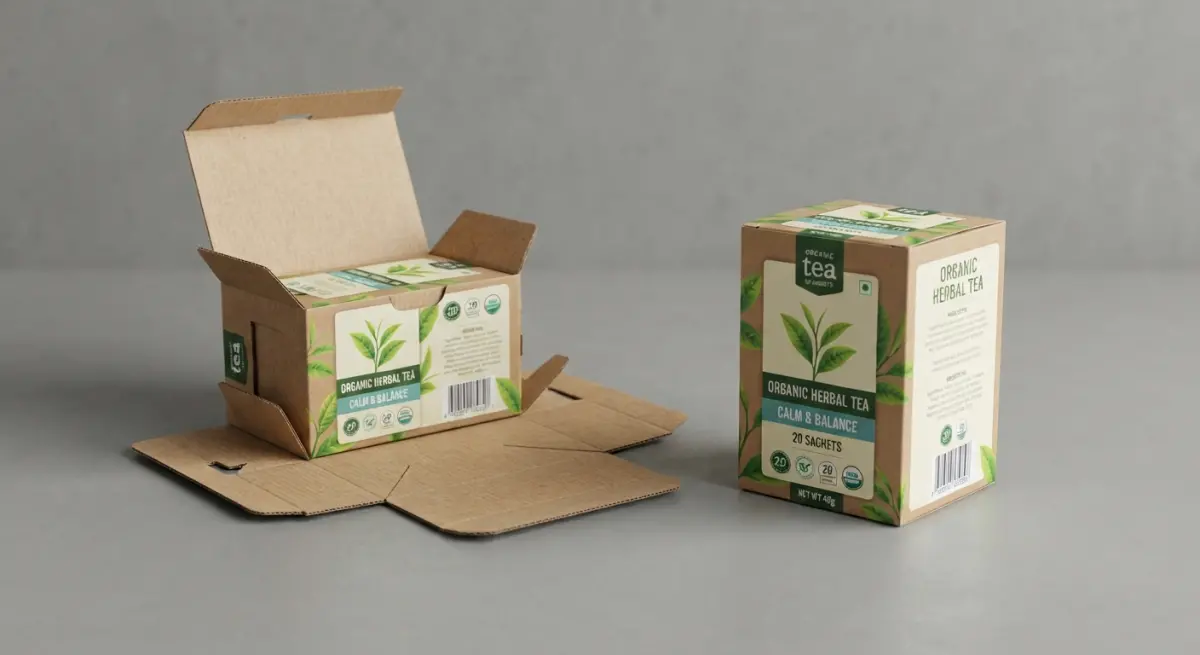
In our experience, the projects that move fastest are the ones where the client sends a short packaging spec sheet alongside the dielines — even an informal one. A single paragraph noting “soft-touch matte finish, gold foil logo, corrugated outer, product weighs roughly 250g” answers half our questions before we ask them.
The projects that stall are usually the ones where the artwork file has spot color layers merged into CMYK before export, so foil and varnish areas are indistinguishable from regular ink. Once that separation is lost, we’re relying on guesswork or a follow-up email, and email threads are slower than a five-minute call.
Another recurring issue: dielines exported without a bleed or trim reference, so panel edges don’t line up cleanly with the artwork boundaries. We can usually reconcile this, but it adds a review cycle that a properly exported file avoids entirely.
One thing that surprises clients is how much a single physical sample changes the outcome. Even a low-quality proof print — not the final production run, just anything tactile — tells us more about board weight, corner behavior, and true color than a dozen back-and-forth emails. If a sample exists, send it or photograph it from a few angles before assuming the digital files are sufficient on their own.
Finally, timeline expectations should factor in structural complexity. A simple tuck-end carton with flat artwork is a quick build. A rigid box with a magnetic closure, an interior insert, a window die-cut, and a separate label wrap is a different scope entirely, closer to what we’d treat as full 3D packaging rendering work with multiple sub-assemblies rather than a single mesh.
When to Loop In a Studio Early Versus Late
Some clients wait until packaging is finalized and printed before commissioning renders. Others come to us while the dieline is still in review, before artwork is locked. Both timings work, but earlier is better if you want the 3D model to double as a design tool — checking how a label wraps around a curved surface, or how a logo reads once a box is folded, is often easier to catch in 3D than on a flat proof. If you’re still iterating on structure, say so in the brief. We’d rather build a rougher model fast and refine it than build a polished one twice.
Briefing a studio with only dielines and artwork isn’t a limitation — it’s actually the normal starting point for most packaging renders we produce, and it works well once both sides know which details need to be volunteered rather than assumed. The files give us geometry and print design; everything else — material finish, structural tolerances, scale, and how light should behave across the surface — comes from a short, specific conversation before modeling starts. If you’ve got dielines and artwork ready and want to see what they actually look like as a photoreal product shot, get in touch with our team through our 3D rendering services contact page and send them over — we’ll tell you exactly what else we need before we start.
Frequently Asked Questions
What files do I need to send a studio to get a 3D render of my product packaging?
At minimum, provide the dieline (vector file showing cut lines, folds, and panel layout) and the final print-ready artwork in a layered format like AI, PDF, or PSD. Include the dieline's exact dimensions and bleed area so the studio can accurately wrap the artwork onto the 3D model without stretching or misalignment.
Can a studio create a 3D render without a physical sample of my package?
Yes, studios routinely build accurate 3D models using only dielines and artwork, since the dieline defines the structural geometry and fold points needed to construct the mesh. However, providing material references, reference photos of similar packaging, or a spec sheet noting finishes like matte, gloss, or foil greatly improves realism.
How do I brief a studio on packaging materials and finishes using only artwork files?
Since artwork files don't convey texture, explicitly describe each finish in your brief, such as spot UV, embossing, foil stamping, or matte lamination, and indicate exactly where on the dieline these apply. Attach photo references or Pantone/finish codes whenever possible, as this prevents the studio from guessing and having to revise renders later.
What information should be included in a 3D packaging render brief besides the dieline and artwork?
Beyond the core files, include the product's real-world dimensions, desired camera angles or hero shots, background/lighting style, and any competitor renders you like for reference. Also specify the final use case, such as e-commerce listings or trade show visuals, since this affects resolution, format, and composition choices.
How do I make sure the artwork wraps correctly onto the 3D model without distortion?
Ensure your artwork file is built directly on top of the dieline template at 100% scale, with all panels, folds, and bleed areas clearly aligned to the structural lines. Communicate any panels that wrap around curves or corners, like on a tapered container, since these areas are most prone to stretching and need extra attention during UV mapping.