From Flat Lines to Full Depth: How to Convert 2D Floor Plan to 3D Model
If you’ve ever handed a client a 2D floor plan and watched their eyes glaze over, you already know the problem. Most people simply can’t read architectural drawings. They see lines, hatches, and dimensions — not a home. That’s exactly why knowing how to convert a 2D floor plan to a 3D model has become one of the most valuable skills in architecture, real estate, and interior design. It bridges the gap between technical documentation and human understanding. And when done well, it doesn’t just communicate space — it sells it.
Whether you’re an architect trying to win a pitch, a developer marketing off-plan properties, or a designer helping a client visualize a renovation, the conversion process follows a clear path. It requires the right tools, a methodical approach, and an eye for spatial accuracy. This guide walks you through every stage — from importing your raw floor plan to producing a model that’s ready for rendering or presentation.
One important note before we start: converting a 2D plan to a 3D model is not just a technical exercise. The goal is always a model that reflects real-world proportions, materials, and light behavior. Cut corners here, and no amount of post-processing will save the final image.
Step 1 — Prepare and Clean Your 2D Floor Plan
Before any 3D software opens, your 2D source material needs to be in good shape. This step gets skipped more often than it should, and it causes headaches later.
Start by checking the scale. A floor plan that’s been scanned, exported from a PDF, or handed over as an image file may not be dimensionally accurate. If you’re working in CAD software like AutoCAD or DraftSight, verify that your units are correct and that a known dimension — say, a door width or room length — matches the real measurement. If it doesn’t, rescale before you do anything else.
Next, clean up the drawing. Remove unnecessary layers like furniture, annotation callouts, or electrical symbols — anything that isn’t a structural element. You want a clear read of walls, openings, columns, and stairs. If you’re working from a raster image (a scanned plan, for example), you’ll need to trace over it manually or use a tool like AutoCAD’s raster-to-vector conversion to get clean, usable linework.
A clean, to-scale floor plan saves hours downstream. It’s the foundation everything else is built on — literally.
Choosing the Right Software for the Conversion
The software you use depends on your end goal. Here’s a practical breakdown:
AutoCAD to Revit or SketchUp
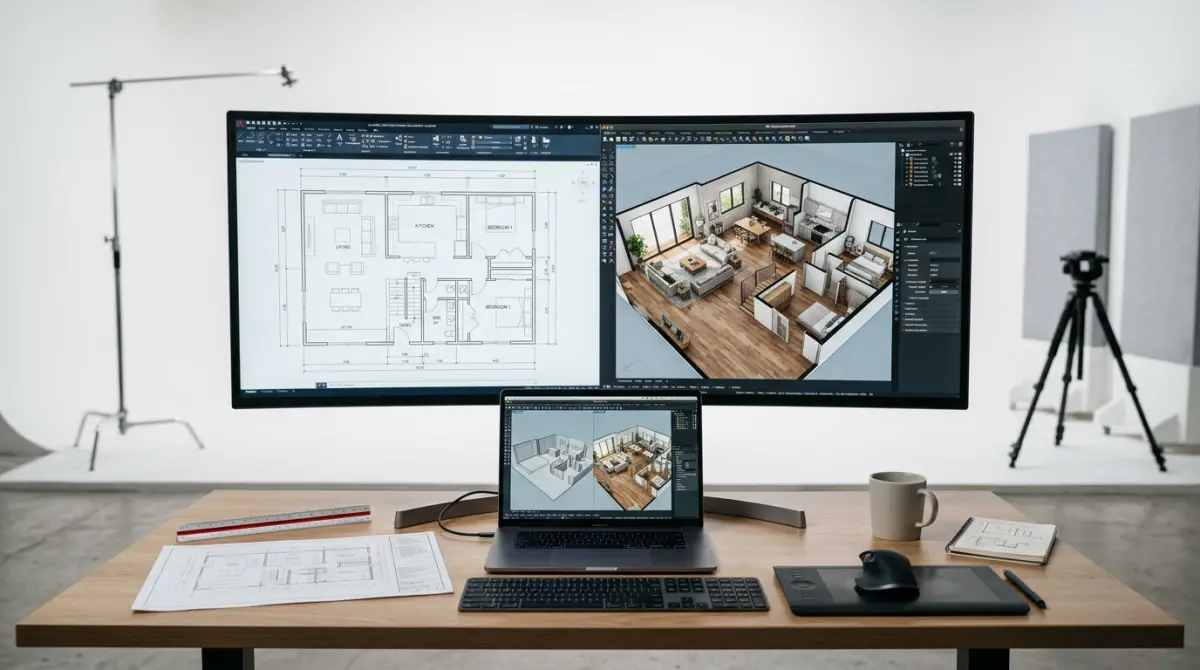
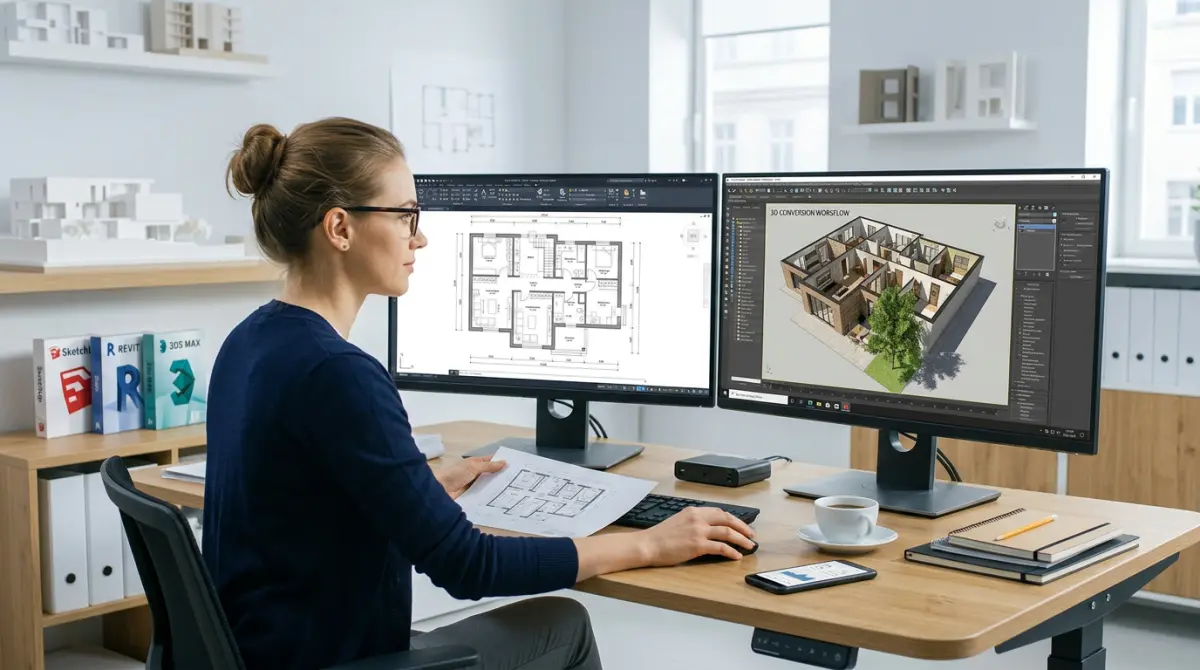
If your floor plan already lives in AutoCAD, the cleanest workflow is to import that DWG file directly into either Autodesk Revit or SketchUp. Revit is the professional standard for Building Information Modeling (BIM), and it lets you push/pull walls up from the floor plan with precise control over height, thickness, and material properties. SketchUp is faster and more forgiving — great for conceptual massing and quick client presentations.
3ds Max and Blender
For photorealistic rendering output, many studios use 3ds Max or Blender to model from floor plans. Both applications allow you to import a DWG or use a floor plan image as a background reference. You then trace and extrude geometry directly in 3D space. Blender, being free and open-source, has become increasingly capable, and a growing number of visualization studios now use it for full production pipelines.
Dedicated Floor Plan Tools
Software like RoomSketcher, Planner 5D, or Cedreo allows non-technical users to draw or import a floor plan and generate a basic 3D model automatically. These are useful for quick walkthroughs or client concept approvals, but they lack the geometric precision and material fidelity needed for high-quality architectural visualization.
The choice ultimately comes down to your output requirements. Quick concept review? A web-based tool might be fine. Professional marketing renders for a real estate launch? You’ll want a full DCC application or a specialist studio pipeline.
How to Convert 2D Floor Plan to 3D Model — The Modeling Process
Once your clean floor plan is imported or traced into your 3D application, the actual modeling follows a logical sequence. Here’s how most professionals approach it.
1. Establish Your Ground Plane and Reference
Set your floor plan image or CAD linework at zero elevation — the ground plane. This becomes your permanent reference for everything that gets built upward. Lock this layer so it doesn’t accidentally move.
2. Model the Walls
Trace the outer perimeter first, then interior walls. In Revit, you use the Wall tool and simply draw along your floor plan lines, specifying wall thickness and height as you go. In SketchUp or Blender, the standard approach is to draw a face from the linework and extrude it upward to your ceiling height. Standard residential ceiling heights are typically 2.4m to 3m, but always refer back to the original documentation.
Pay close attention to wall intersections. Walls should connect cleanly — no gaps, no overlaps. This matters especially if you’re planning to use the model for lighting simulations or VR walkthroughs, where geometry errors become very visible.
3. Cut Openings for Doors and Windows
Once walls are up, cut openings for doors and windows. In Revit, this happens automatically when you place door and window families. In SketchUp or 3ds Max, you’ll typically use Boolean operations or manual face deletion to create openings, then insert door and window components at the correct dimensions and heights.
Window sill height is usually around 900mm from finished floor level. Door openings are typically 2100mm high. These aren’t design choices — they’re building code norms in most markets, and getting them right makes your 3D model credible.
4. Add Floors, Ceilings, and Roof
Floor slabs, ceiling planes, and roof geometry complete the basic shell. Even if your visualization will only show interior spaces, model the floors and ceilings properly — they affect how light behaves in your rendering environment. A roof, even a simplified one, matters for any exterior view.
5. Bring in Furniture and Fixtures
At this stage, your model is structurally complete. Now you furnish and detail it. Most studios work from furniture libraries — pre-built 3D assets that match real products. Placing these accurately in plan view, then adjusting their elevation, keeps everything proportionally grounded in the original floor plan geometry.
Materials, Lighting, and the Path to a Final Render
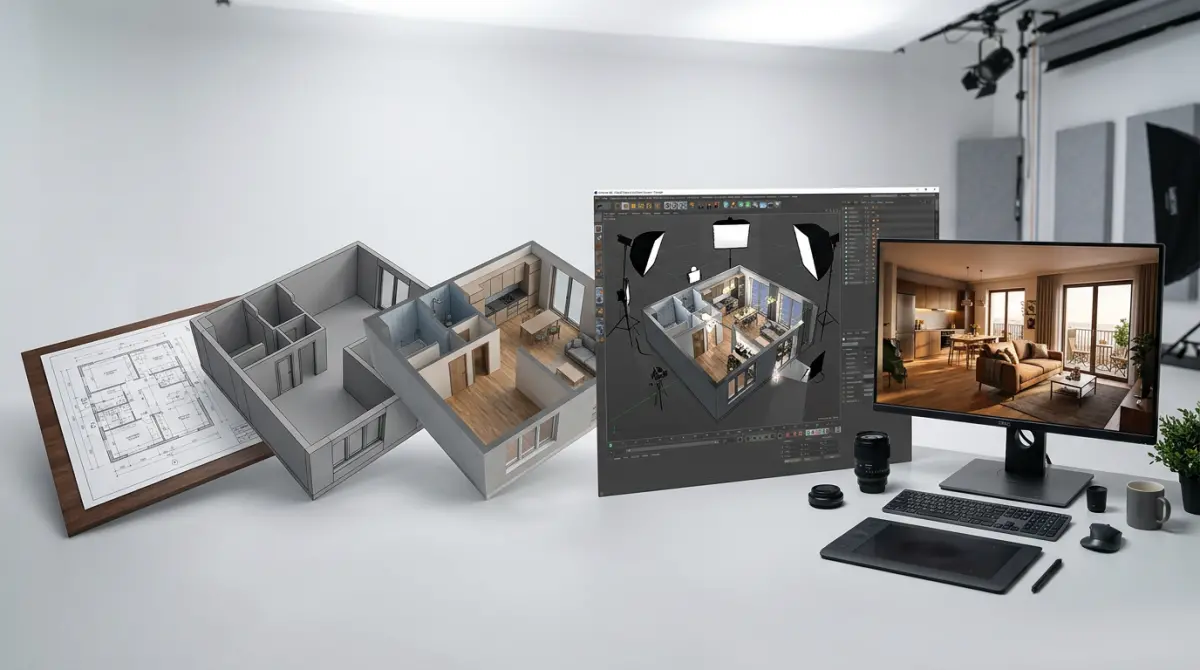
A 3D model without materials is just grey geometry. Applying textures — wood flooring, painted plaster, glass, tile — transforms the model into something that communicates mood, quality, and character. This is where architectural visualization becomes genuinely persuasive.
Material work and lighting setup are closely linked. The way a surface reads in a render depends as much on how it’s lit as on the texture itself. A rough concrete wall under warm directional light reads very differently than under flat ambient light. Professional studios spend significant time on lighting — it’s often what separates a convincing render from one that looks obviously computer-generated.
If you’re producing work for client presentations or marketing purposes, this is the stage where working with a specialist makes the most sense. The technical modeling is something a skilled architect or draftsperson can handle; the final lighting, material work, and rendering is a craft in its own right. That’s what professional architectural rendering services are specifically built to deliver.
For residential projects specifically — particularly when marketing off-plan homes or apartments — residential 3D rendering can make the difference between a buyer connecting emotionally with a property and walking away unconvinced.
Practical Tips for Better Conversions
After working on hundreds of floor plan conversions, certain habits consistently produce better results. Here are the ones worth building into your workflow:
- Always model to real-world scale. Never estimate dimensions. If the plan says a room is 4200mm wide, model it at exactly 4200mm. Scaling errors compound through every downstream stage.
- Use a layer/object naming convention from the start. Walls, floors, windows, furniture — organized from day one. Retrofitting organization into a complex model is painful.
- Keep the floor plan visible during the entire modeling process. It’s easy to drift from the source document when you’re deep in 3D space. Periodic cross-checks against the original plan catch errors early.
- Model what will be seen. No need for full structural detailing inside walls or above ceilings if those areas won’t appear in your final views. Work smart — invest your modeling effort where the camera will actually look.
- Check your geometry before rendering. Reversed normals, non-manifold edges, and open faces all cause rendering artifacts. A clean geometry check before you hand the model off to a renderer saves re-render time and costs.
For commercial projects — retail environments, offices, or hospitality spaces — there’s additional complexity in the material and fixture work. Commercial 3D rendering requires particular attention to branded elements, signage, and lighting design, all of which need to be grounded in the original floor plan layout.
Interior designers often use the conversion process specifically for client approval before committing to finishes. A 3D model lets a client point at a space and say “I want that floor tile to be lighter” — which is far more productive than trying to interpret that feedback from a 2D drawing. Interior 3D rendering has become a standard part of the design approval process for exactly this reason.
When to DIY and When to Bring in a Specialist
If you’re an architect or designer with modeling experience, handling your own conversions for early-stage work makes complete sense. Speed matters at the concept phase, and you don’t need production-quality renders to communicate a layout.
But for final client deliverables — marketing images, planning applications, investor presentations — the quality bar is different. Clients and stakeholders compare what they see against finished photography, and anything that looks unpolished undermines confidence in the project itself.
That’s where the division of labor between design professionals and visualization studios makes practical sense. You focus on the design; the studio focuses on making it look exactly as it would in real life.
Ready to Turn Your Floor Plans Into Compelling Visuals?
Understanding how to convert a 2D floor plan to a 3D model is the first step. But producing renders that actually move clients, win approvals, and close sales requires a level of craft and technical investment that goes well beyond the modeling stage.
At 360render.com, we work with architects, developers, and designers to take floor plans — at any stage of development — and produce photorealistic 3D visualizations built around your specific communication goals. Whether you need a single interior render or a complete marketing package for an off-plan development, the process starts with a conversation.
Get in touch with our team to discuss your project. Bring your floor plans — even rough ones — and we’ll show you what’s possible.
Frequently Asked Questions
What software is best for converting a 2D floor plan to a 3D model?
Popular software options for converting 2D floor plans to 3D models include AutoCAD, SketchUp, Revit, and Planner 5D, each catering to different skill levels and project needs. For beginners, tools like RoomSketcher or Planner 5D offer intuitive drag-and-drop interfaces, while professionals often prefer Revit or AutoCAD for more detailed architectural accuracy. Choosing the right software depends on your budget, technical expertise, and the complexity of the floor plan you are working with.
How long does it take to convert a 2D floor plan into a 3D model?
The time required to convert a 2D floor plan into a 3D model varies depending on the complexity of the layout, the level of detail needed, and the software being used. A simple residential floor plan can take anywhere from a few hours to a full day, while complex commercial projects may take several days or even weeks. Using automated conversion tools or hiring a professional 3D modeling service can significantly reduce the turnaround time.
Can I convert a 2D floor plan to a 3D model for free?
Yes, several free tools allow you to convert a 2D floor plan into a 3D model, including SketchUp Free, Planner 5D, and Sweet Home 3D, which are widely used by homeowners and hobbyists. These free versions typically offer basic modeling features, though advanced rendering, export options, and collaboration tools are often locked behind paid plans. For professional-quality results, investing in a paid software or service is usually recommended.
What file formats are needed to convert a 2D floor plan into a 3D model?
Common file formats used when converting a 2D floor plan to a 3D model include DWG, DXF, and PDF, as these are standard formats output by architectural drafting tools like AutoCAD. Most 3D modeling software can import DWG or DXF files directly, making it easier to use the 2D layout as a reference or base layer for building the 3D structure. If your floor plan is only available as a scanned image or JPEG, you may need to manually redraw or trace it within your chosen 3D software.
Do I need architectural experience to convert a 2D floor plan to a 3D model?
You do not necessarily need formal architectural experience to convert a simple 2D floor plan into a 3D model, especially with user-friendly tools like Planner 5D, RoomSketcher, or Sweet Home 3D that guide you through the process step by step. However, for more technical and detailed projects such as construction planning or professional presentations, having a basic understanding of architectural drawing conventions and 3D modeling principles is highly beneficial. Many online tutorials, YouTube videos, and courses are available to help beginners quickly learn the skills needed for this type of conversion.
Also read: 3D Floor Plan Visualization vs Traditional Blueprints: Which Sells Properties Faster?