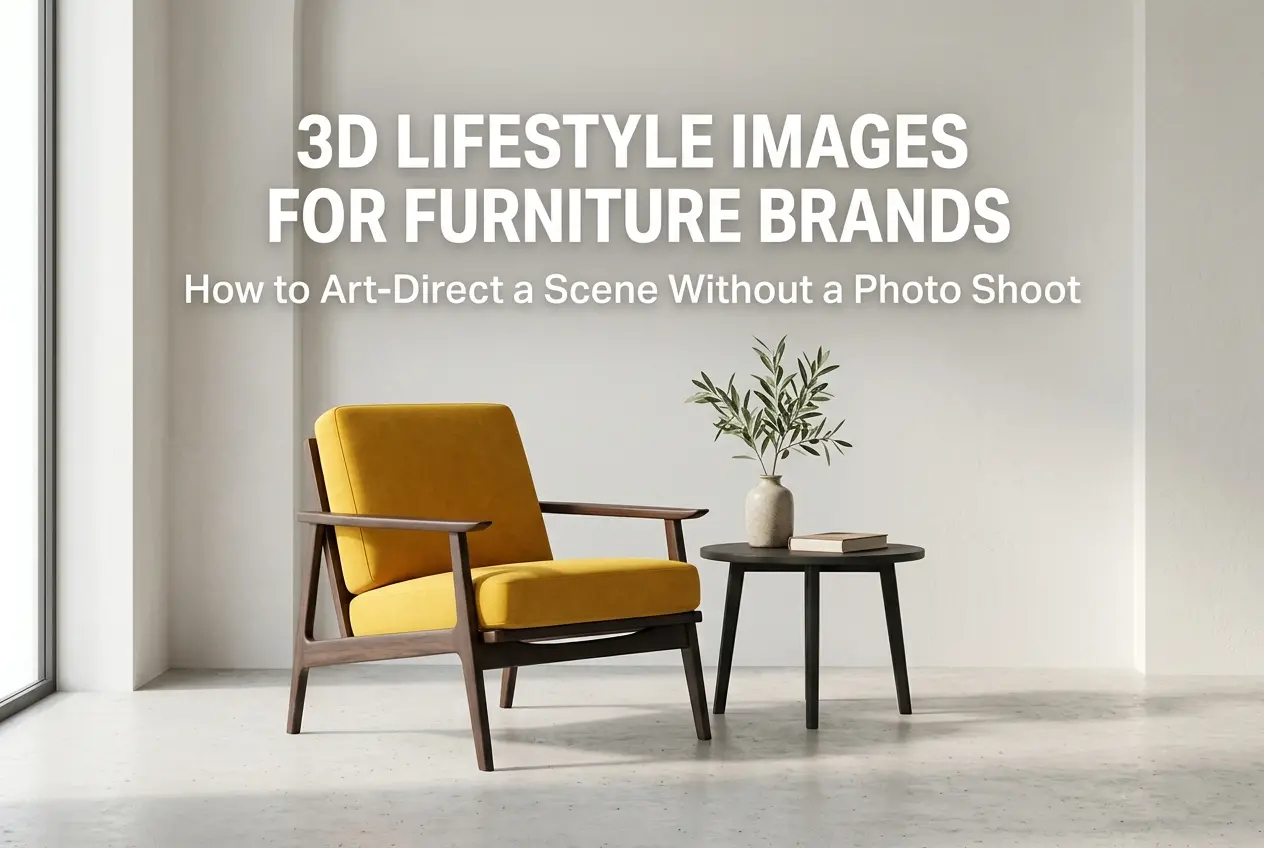
Furniture brands face a specific, expensive problem: showing products in context. A hero shot on a white background tells buyers what something looks like. A lifestyle image tells them how it feels to own it — the light coming through the window, the rug underneath, the coffee table nearby. That emotional context drives purchase decisions. The challenge is that traditional lifestyle photography means building sets, hiring stylists, booking photographers, and shipping physical samples. It’s slow, costly, and inflexible. That’s exactly why 3D lifestyle images for furniture brands — and knowing how to art-direct a scene without a photo shoot — has become one of the most requested services we deliver at 360render.com. Done well, a rendered lifestyle scene is indistinguishable from photography. Done poorly, it looks like a video game screenshot from 2009. The difference almost always comes down to art direction, not render quality.
Most clients come to us thinking the hard part is the 3D modeling. It isn’t. Modeling is technical and time-bound — we can build an accurate sofa model from technical drawings in a day. The harder work is deciding where that sofa lives, who theoretically owns it, what time of day it is, and what else is in the frame. These are art direction decisions. They require the same thinking a creative director brings to a real photo shoot, just applied to a virtual environment. The good news is that when you understand how these decisions work in 3D, you can brief your rendering team far more effectively and get results that actually match your brand rather than a generic “nice room” that could belong to any furniture catalogue.
This post is a practical guide to that process. Whether you’re briefing a rendering agency or trying to understand what goes into the work, these are the actual decisions that determine whether a lifestyle render feels authentic or artificial.
Why Art Direction Matters More Than Render Resolution
Render engines today — whether V-Ray, Corona, or Unreal — are all capable of photorealistic output. The technology gap between studios has narrowed significantly. What separates a compelling lifestyle image from a technically correct but flat one is almost never the render engine. It’s the decisions made before the first ray is calculated.
Think of it this way. A photographer on set makes hundreds of micro-decisions: where to place a lamp, whether to fold a throw blanket or let it drape naturally, whether to shoot wide or tight, how much to open the blinds. Every one of those decisions communicates something about the lifestyle being sold. A 3D artist working without a strong brief makes those same decisions by default — and “default” in 3D tends to look safe, centered, and sterile.
In our studio, we treat every lifestyle render brief the same way a photo director would approach a shoot brief. Before we open any 3D software, we need to know the target buyer, the brand positioning, the room size, the time of day, and the supporting props. These aren’t nice-to-haves. They’re the foundation of every visual decision that follows.
How to Art-Direct a Scene Without a Photo Shoot: The Brief That Actually Works

The single biggest mistake furniture brands make when commissioning lifestyle renders is under-briefing. They send us a product spec sheet and write “please make it look nice.” That’s not a brief. That’s an invitation for us to guess, and our guess might not match your brand.
Here’s what a usable brief contains:
| Brief Element | What It Drives in the Scene | Common Client Mistake |
|---|---|---|
| Target buyer persona | Prop selection, level of clutter, room size feel | Skipping this entirely |
| Room architecture style | Wall finish, ceiling height, flooring material | Saying “modern” without reference images |
| Time of day / light quality | Natural light angle, warmth, shadows, mood | Leaving it to the artist’s discretion |
| Colour palette | Wall paint, rug, cushions, background props | Providing product colours but no scene palette |
| Camera angle and crop | What’s in frame, what’s implied off-frame | Asking for “various angles” without priority |
| Mood references | Overall feel — aspirational, cosy, minimal, etc. | Sending competitor images without explaining what they like about them |
Reference images are the most efficient briefing tool available. A curated Pinterest board of 10-15 images communicates more than three paragraphs of written description. But — and this is important — tell us specifically what you like about each reference. Is it the light quality? The prop density? The camera height? Without that context, we might be drawn to a reference for its colour palette when you actually liked its composition.
Building the Scene: Decisions That Make or Break Realism
Lighting: The One Variable That Changes Everything
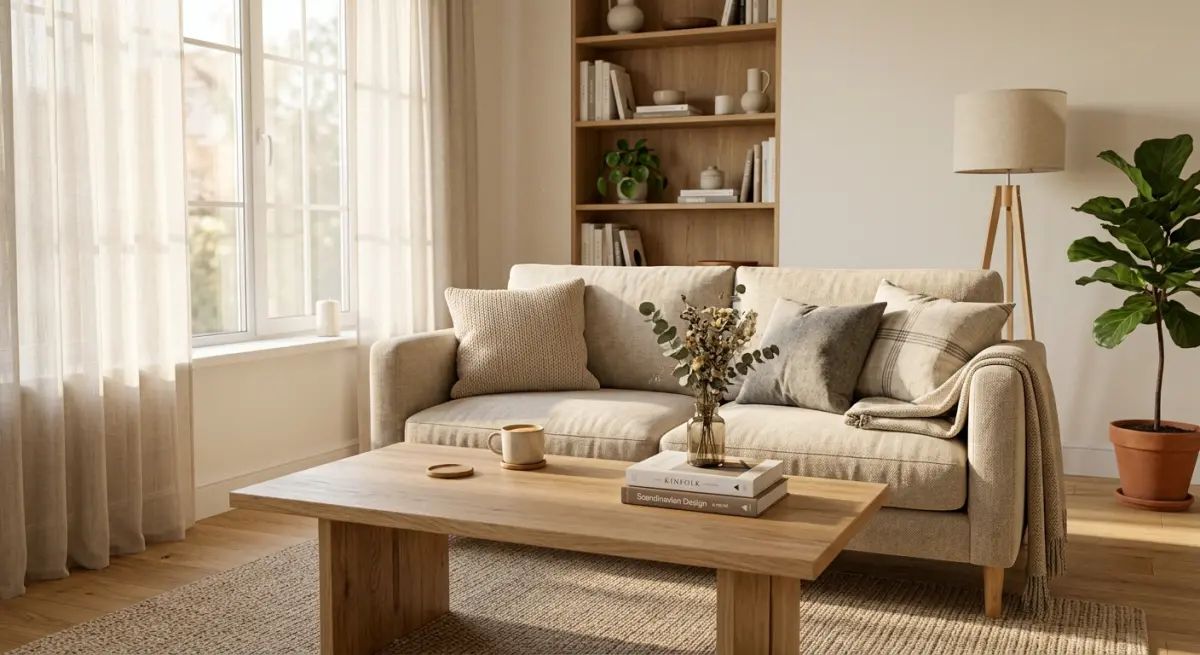
Natural light is the most powerful tool in lifestyle rendering. We almost always use an HDRI environment combined with specific window geometry to control where the light enters and how it wraps around the product. The time of day choice matters enormously. Midday light is harsh and flat — it tends to make interiors look sterile. Late afternoon light (around 4-6pm depending on season) creates warmer tones, longer shadows, and a sense of lived-in comfort that reads as aspirational without feeling cold.
Overcast lighting has its own uses — it’s excellent for showing material accuracy because there are no strong shadows competing with texture detail. For sofa fabrics and wood grain finishes, we sometimes recommend an overcast hero shot alongside a warmer lifestyle angle.
Artificial lighting layers add depth. A floor lamp switched on, even in daytime, adds a warm fill that draws the eye and implies someone lives here. These details are free in 3D and expensive on set.
Props and Styling: The Difference Between a Room and a Scene
Empty rooms look like showrooms. Styled rooms look like homes. The props you choose — books, plants, ceramics, trays, throws — communicate the lifestyle your product belongs to. In 3D, we have extensive prop libraries, but the selection and placement still requires editorial judgment.
A few principles we apply consistently:
- Odd numbers feel more natural — three objects on a shelf reads as curated; two reads as placed.
- Scale contrast creates interest — a tall plant next to a low side table creates visual rhythm that a flat arrangement of equal-height props doesn’t.
- Hero product should occupy the most light — the sofa or dining table should be where the best natural light falls. Everything else supports it.
- Imperfection signals authenticity — a slightly open book, a cushion that’s been leaned into, a cup on a tray. These micro-details tell the viewer someone actually uses this space.
Camera: Angle, Height, and Focal Length
Camera choices in 3D are identical in effect to camera choices in photography. A low camera angle (around 60-80cm off the floor) makes furniture feel grounded and substantial. Eye-level shots work well for dining scenes. High angles suit flat lays and bedroom scenes where bed styling is the feature.
Focal length affects how the room feels. A wider lens (24-35mm equivalent) makes spaces feel larger and airier — useful if your product targets apartment buyers. A longer lens (50-85mm) compresses depth and isolates the product from background clutter, feeling more premium and editorial. We recommend specifying both if you’re not sure — a clay render at both focal lengths costs very little and saves revision cycles.
What Clients Get Wrong About 3D Lifestyle Images for Furniture Brands
We see the same mistakes repeatedly, and most of them come from treating 3D as a cost-cutting exercise rather than a creative process with its own requirements.
Providing low-resolution or incomplete product references. A lifestyle render is only as accurate as the product data we start with. If we receive one blurry product photo and no material specifications, we’ll have to make assumptions about the fabric texture, leg finish, and cushion depth. Those assumptions cost revision rounds. The best project briefs include technical drawings, material swatches (physical or digital), and close-up photos of key details.
Approving the 3D model before reviewing the scene layout. Clients sometimes focus all their feedback energy on the product model accuracy, then ask for major scene changes at the final render stage. Scene changes — moving walls, changing flooring, adjusting camera — at the near-final stage are expensive. We always recommend a blocked-out grey box render for scene approval before investing in full lighting and texturing.
Trying to show too much product in one frame. We’ve had briefs asking us to include a sofa, two armchairs, a coffee table, a console, and a dining set in one lifestyle image. The result is a catalogue page, not a lifestyle scene. Lifestyle means editorial restraint. One hero product, two or three supporting pieces, and enough breathing room for the eye to settle.
Ignoring the background architecture. The room itself is part of the product story. A mid-century modern sofa in a heavily detailed Victorian room sends a confused message. The wall finish, ceiling style, and floor material all need to align with the product’s design language and the target buyer’s aspirational home.
Formats, Deliverables, and What to Ask For
When commissioning lifestyle renders, clarify outputs before work begins. A single scene can yield multiple deliverables — different camera angles, a cropped square version for Instagram, a wide horizontal for website banners, close-up detail crops for product pages. Because the scene is built once in 3D, additional angles are significantly cheaper than a reshooting equivalent on set.
Always ask for the scene file to be archived. If you launch a new colourway six months later, re-rendering with updated material takes hours, not days — but only if the original scene is preserved. Many brands miss this and end up rebuilding scenes from scratch at full cost.
If you’re also commissioning product-only shots on white or transparent backgrounds, request those from the same scene where possible. The model is already built — rendering it in isolation adds minimal time and gives you consistent product proportions across all your imagery.
For brands building out a full image library across a product range, our furniture 3D rendering services are structured to handle both hero product renders and lifestyle scenes within the same workflow, which keeps modelling costs down when you’re covering multiple SKUs.
Conclusion: Brief Well, Get Results That Match Your Brand
Creating convincing 3D lifestyle images for furniture brands without a photo shoot isn’t just about rendering software. It’s about making the same creative decisions a photo director makes on set — just earlier in the process and with more control over the outcome. The brief is your creative direction. The scene architecture, lighting, props, and camera are your set. The render is your photograph.
When you invest the same thinking into a 3D brief that you’d put into planning a physical shoot, you get results that are indistinguishable from photography, faster to produce, and far easier to update as your product line evolves. The technology is there. The process is learnable. The art direction is where your brand voice actually lives.
If you’re ready to start a project or want to talk through how to structure a brief for your product range, get in touch with our team and we’ll walk you through what we need to get started.
Frequently Asked Questions
What are 3D lifestyle images for furniture brands and how are they different from traditional product photography?
3D lifestyle images are computer-generated scenes that show furniture pieces styled in realistic room settings, created entirely using 3D rendering software without a physical photo shoot. Unlike traditional photography, they don't require physical prototypes, studio rentals, props, or lighting crews, making them significantly faster and more cost-effective to produce. Furniture brands use them to showcase products in aspirational environments before items are even manufactured, giving marketing teams a major head start.
How do you art-direct a 3D furniture scene without being on a physical set?
Art-directing a 3D furniture scene is done through detailed creative briefs that specify camera angles, lighting mood, color palettes, prop selections, and overall room atmosphere, which are then executed by a 3D artist or studio. You can reference mood boards, Pinterest collections, and real interior photography to communicate the exact aesthetic you want, just as you would with a traditional photographer. Most studios also offer iterative review rounds where you can request adjustments to styling, shadows, or textures before the final render is delivered.
How much does it cost to produce 3D lifestyle images for furniture brands compared to a traditional photo shoot?
A single 3D lifestyle render for a furniture brand typically ranges from $300 to $1,500 per image depending on complexity, scene detail, and the studio's experience level, while a traditional lifestyle photo shoot can easily cost $5,000 to $30,000 or more when factoring in location fees, props, stylists, photographers, and models. The cost advantage of 3D becomes even more significant when you need multiple colorways or room configurations, since a 3D scene can be re-rendered with new finishes or layouts at a fraction of the original cost. For growing furniture brands with limited budgets, 3D lifestyle imagery offers premium visual quality without the overhead of a full production.
What information do furniture brands need to provide to a 3D studio to get accurate and on-brand lifestyle renders?
To produce accurate lifestyle renders, furniture brands should supply high-resolution product photos from multiple angles, technical drawings or CAD files, material swatches or Pantone codes, and finish specifications such as fabric texture, wood grain, or metal sheen. Alongside product assets, brands should share a creative brief that outlines the target room style, intended customer lifestyle, preferred color story, and any specific props or accessories that should appear in the scene. The more detailed and organized the asset package, the fewer revision rounds are needed and the closer the first draft will be to the final approved image.
Can 3D lifestyle images for furniture look as realistic as real photography, and will customers trust them?
Modern 3D rendering technology, especially photorealistic CGI using ray-tracing engines like V-Ray or Corona, can produce lifestyle images that are virtually indistinguishable from real photography when executed by an experienced studio. Studies and real-world case studies from brands like IKEA, which replaced a large portion of its catalog photography with 3D renders years ago, confirm that consumers respond to high-quality CGI just as positively as they do to traditional photos. The key to maintaining customer trust is ensuring accurate material representation and honest product dimensions, so shoppers receive exactly what they saw in the lifestyle image.
Also read: How to Use 3D Lifestyle Images to Increase Furniture Conversion Rates on Amazon and Shopify