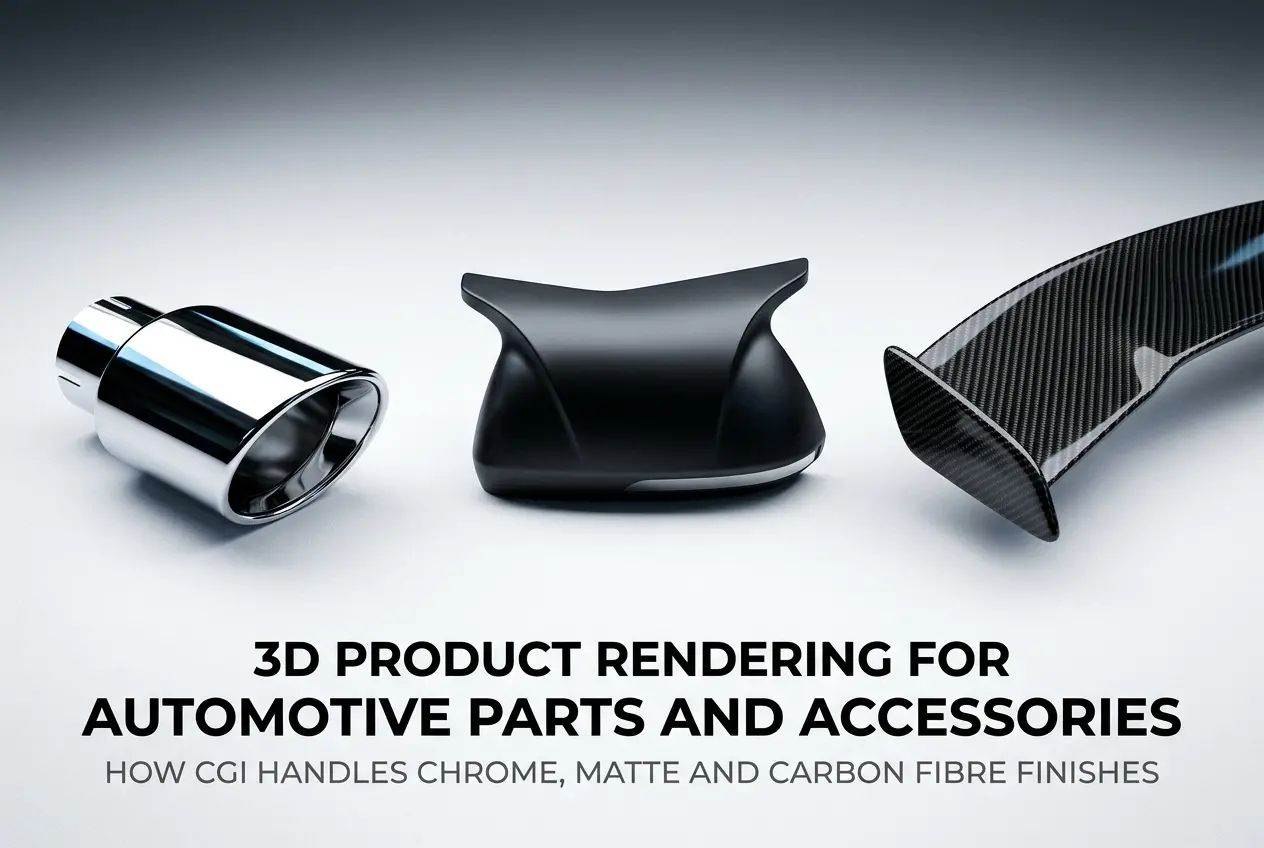
Automotive parts and accessories are among the hardest product categories to photograph well. Chrome scratches. Carbon fibre shifts colour depending on ambient light. Matte finishes pick up every fingerprint and inconsistency in a studio setup. That’s exactly why 3D product rendering for automotive parts and accessories — and specifically how CGI handles chrome, matte and carbon fibre finishes — has become the go-to solution for brands that need consistent, publication-ready visuals without the chaos of a physical shoot. In our studio, we’ve worked across everything from aftermarket alloy wheels and exhaust tips to full interior trim kits, and each finish type demands a completely different technical approach inside the renderer.
If you’re a product manufacturer, an e-commerce seller, or an accessories brand trying to figure out whether CGI can accurately represent your product — the short answer is yes, absolutely. But the quality of that output depends entirely on how well the artist understands material physics, lighting behaviour, and the specific visual language of each finish. Let me walk you through what actually happens under the hood when we build these materials.
Why Automotive Finishes Are Technically Demanding in CGI
Most product renders are hard. Automotive finish renders are harder. The reason is that these surfaces don’t just reflect light — they interact with it in complex, physically layered ways. A chrome exhaust tip isn’t just a shiny surface; it’s a near-perfect mirror that shows the full environment around it, including studio lights, floor reflections, and the product’s own geometry. Carbon fibre has a woven structure with a clear coat on top, meaning light hits two distinct layers before your eye even registers the texture. Matte finishes scatter light diffusely, but the right kind of diffuse — there’s a difference between a flat, dead matte and the rich, velvety matte you see on premium automotive trim.
Physical photography can handle these surfaces, but it requires specialist photographers, controlled environments, and often multiple sessions to get each finish looking its best. CGI, when done properly, gives you full control over all of those variables in a single working environment. The trade-off is that the artist needs a deep understanding of PBR (Physically Based Rendering) materials, HDRI lighting, and surface microstructure simulation.
How CGI Handles Chrome Finishes on Automotive Parts
Chrome is deceptively simple-looking but technically demanding to render convincingly. Real chrome is an electroplated surface with near-zero roughness — it reflects almost everything. In a PBR workflow, chrome is represented as a metallic material with roughness values close to zero and reflectivity close to one. Sounds straightforward, but the challenge is what the chrome actually reflects.
In a bad render, chrome looks like a grey blob because the environment around it is unconvincing. In a good render, the chrome shows clean, sharp reflections of the lighting environment, the product’s own curvature, and carefully placed highlight sources. We use HDRI environments specifically chosen or custom-built for chrome — ones with strong light contrast so the reflections have readable bright and dark zones, which is what gives chrome its characteristic visual pop.
There’s also a distinction between decorative chrome (bright, mirror-like, typically on exterior trim pieces, grilles, or badge surrounds) and brushed chrome (still metallic but with a slightly higher roughness and directional texture). Brushed chrome uses an anisotropic reflection model — the highlights stretch in one direction based on the brush marks — which requires either a procedural or texture-mapped roughness input to get right. We often build these from real surface scans or high-resolution texture libraries when the product demands accuracy.
One thing clients frequently get wrong: they ask for “more shine” when the render looks dull, but the real issue is the lighting environment. Chrome only looks chrome when the environment has contrast. A render in a flat, even studio with no strong light sources will make chrome look like pewter. The fix is in the HDRI, not the material.
Rendering Matte Finishes — Getting the Texture Right Without Losing Depth

Matte automotive surfaces — matte black trim, matte carbon-look panels, soft-touch interiors — are the opposite problem. These are non-reflective or near-non-reflective, which means the material itself and the surface micro-texture carry all the visual information. Get those wrong and the product looks flat and cheap.
In a PBR setup, matte materials have high roughness values and typically a low specular contribution. But “high roughness” doesn’t mean you set roughness to 1.0 and call it done. Real matte automotive surfaces still have a tiny amount of specular response — you can see a very soft, wide highlight on them in raking light. That subtle response is what separates a convincing matte from a dead, flat-shaded surface.
The other key element is surface normal detail. Matte surfaces rely on micro-surface texture to feel real. A smooth matte with no normal map just looks like a computer-generated grey plane. We’ll typically use a subtle noise-based normal map or a scanned texture from a physical reference material to give it the right granularity. For soft-touch rubberised surfaces like interior trim handles, there’s often a slightly pebbled texture underneath that needs to be baked in.
Lighting for matte parts is almost the opposite of chrome. You want broader, softer light sources — area lights, large bounce panels — that reveal the surface gradually. Sharp point lights or small spots will create harsh hotspots that make matte look inconsistent. In our studio workflow, matte-heavy products often get their own lighting rig separate from specular-heavy ones.
Carbon Fibre — The Most Complex Material in Automotive Rendering
Carbon fibre is where most renders fall apart, and also where a good artist earns their fee. Real carbon fibre is a woven composite material with a glossy clear coat applied over the top. What you’re actually seeing when you look at a carbon fibre part is: the weave pattern underneath, the depth of the clear coat between your eye and the weave, and the specular highlight on the clear coat surface itself. That’s a multi-layer material, and it has to be built that way.
A lazy approach to carbon fibre rendering is to slap a carbon fibre texture on a surface and add some reflectivity. The result looks flat and unconvincing because it ignores the parallax and depth between the clear coat and the weave, and it misses the directional shift in the fibre appearance as your viewing angle changes. Real carbon fibre has a characteristic flip — it shifts between lighter and darker as you rotate around it — caused by the way the woven fibres catch light at different angles.
The correct approach uses a layered material setup. Base layer: the woven carbon texture with its own roughness and normal map. Clear coat layer: a second specular layer on top with very low roughness, simulating the lacquer. The combination gives you the depth, the highlight separation, and the angular shift. In render engines like V-Ray or Arnold, this is built using a coat layer within the material definition. In Blender’s Cycles, it’s typically a shader mix or a custom node group. The weave itself is often built procedurally or from a high-resolution texture map — ideally both, so the pattern tiles correctly at different distances and scales.
One observation from real projects: carbon fibre renders look significantly better under directional lighting than under fully diffuse environments. You need a clear highlight source to show the clear coat specular, and you need enough environmental contrast to show the weave’s light/dark flip. An HDRI with a dominant light source — like a bright sky with a visible sun, or a studio HDRI with a strong key light — works much better than a flat, uniform dome light.
Practical Table: Finish Type vs. Key Technical Parameters

| Finish Type | Roughness Range | Material Layer Count | Lighting Priority | Common Mistake |
|---|---|---|---|---|
| Mirror Chrome | 0.0 – 0.05 | Single (high metallic) | High-contrast HDRI | Flat HDRI = grey blobs |
| Brushed Chrome | 0.1 – 0.25 (anisotropic) | Single + aniso map | Directional key light | Missing anisotropy direction |
| Matte Trim | 0.7 – 0.95 | Single + normal map | Broad, soft area lights | Zero specular = dead flat |
| Carbon Fibre | Base 0.4–0.6 / Coat 0.0–0.1 | Two-layer (coat over base) | Directional + ambient mix | Single-layer texture only |
What Clients Get Wrong When Briefing Automotive Part Renders
The most common issue we see is reference material. Clients send a single product photo taken on a phone under office lighting and ask us to replicate the finish. That’s almost useless as a reference for material building. What we actually need: close-up shots in raking light to show surface texture, shots under different angles to show reflectivity behaviour, and ideally physical samples or manufacturer spec sheets that describe the coating type.
Second issue: clients often conflate colour and finish. “It’s gloss black” tells us something, but gloss black chrome is not the same as gloss black painted ABS plastic, which is not the same as gloss black anodised aluminium. Each of those has a different reflectivity model and a different surface response. The more precise your brief, the faster we build accurate materials.
Third: expecting carbon fibre to look the same at every angle. It doesn’t in real life, and it shouldn’t in CGI either. If your renders show carbon fibre looking identical from a straight-on shot and a 45-degree angle shot, the material isn’t built correctly. The angular variation is a feature, not a problem.
We’ve also found that clients underestimate how much lighting influences finish perception. The same chrome material can look dramatically different across two renders with different HDRI environments. This is why our process includes a lighting sign-off stage — getting the environment right before fine-tuning materials, not the other way around.
When CGI Makes More Sense Than Photography for Automotive Parts
For e-commerce catalogues with multiple colourway or finish variants, CGI is simply more practical. If you’re launching a spoiler in five finishes — gloss black, matte black, carbon fibre, brushed silver, and chrome — shooting each variant cleanly in a studio is expensive and time-consuming. In CGI, once the geometry is finalised, swapping materials is a fraction of the total production time.
CGI also handles scale and context better. Showing a grille insert in isolation on a white background tells a customer less than showing it fitted to a vehicle in a realistic environment. With rendering, we can composite the part into a vehicle cutaway or a lifestyle scene without needing the actual car on set. For performance exhausts, intercoolers, and under-bonnet components, this kind of contextual imagery significantly improves customer understanding of fitment and appearance.
If you’re a product developer or accessories brand looking to build out a visual library, our 3D product rendering services are set up specifically for this kind of multi-SKU, multi-finish production work. We handle material builds, lighting, and final delivery in whatever format your platform requires — whether that’s e-commerce images, catalogue spreads, or video turntable animations.
Conclusion
3D product rendering for automotive parts and accessories — particularly across chrome, matte and carbon fibre finishes — is a technical discipline that rewards specificity. Each material type has its own physics, its own lighting requirements, and its own failure modes. Chrome lives or dies by its environment. Matte needs micro-surface detail and soft light. Carbon fibre demands a layered material approach and directional lighting to show the clear coat properly.
Done well, CGI produces automotive part visuals that are not only usable but genuinely better than photography for a lot of use cases — more consistent, more scalable, and more flexible for downstream use. Done poorly, you end up with renders that look synthetic and flat, which is the worst outcome because it reflects on the product itself.
If you want to discuss a project — whether you’re building a product catalogue, launching a new accessory line, or just need reference-quality renders for a few hero products — reach out to us directly at 360render.com. We’re happy to walk through your finish requirements and give you an honest assessment of what’s achievable and how long it takes.
Frequently Asked Questions
How does CGI accurately replicate chrome finishes on automotive parts without physical photography?
CGI replicates chrome finishes using physically based rendering (PBR) techniques that simulate real-world light behavior, including near-perfect reflectivity, environment mapping, and ray tracing to capture surrounding reflections with photorealistic accuracy. Artists apply high-dynamic-range imagery (HDRI) to create the complex, mirror-like surface response that chrome produces in real environments. This approach often surpasses physical photography because lighting and reflection environments can be fully controlled and adjusted without costly re-shoots.
What makes rendering carbon fibre weave patterns in 3D so technically challenging for automotive accessories?
Carbon fibre presents a unique challenge because its distinctive woven texture requires highly detailed normal maps or displacement maps combined with an anisotropic reflection model that captures the directional sheen produced by each individual fibre strand. The interplay between the glossy resin coating on top and the underlying matte weave structure demands a multi-layered shader setup to achieve authentic results. Getting the scale, weave pattern angle, and specular highlight direction correct is critical, as even slight inaccuracies are immediately noticeable to automotive enthusiasts familiar with the material.
How does 3D product rendering handle matte finishes on automotive parts compared to gloss finishes?
Matte finishes in CGI are achieved by increasing surface roughness values within PBR shaders, which scatters reflected light broadly rather than producing sharp specular highlights, accurately mimicking how matte paint or coatings absorb and diffuse light. Unlike gloss finishes that require precise environment reflections and specular tuning, matte materials demand careful attention to subtle color variation, micro-surface texture, and soft ambient occlusion to avoid looking flat or artificial. The result is a render that convincingly communicates that velvety, non-reflective quality that makes matte automotive finishes so visually distinctive.
Is 3D CGI rendering cost-effective for automotive parts manufacturers compared to traditional product photography?
Yes, 3D CGI rendering becomes significantly more cost-effective than traditional photography when a manufacturer needs to showcase multiple finish options, colorways, or configurations of the same automotive part, since all variations can be produced from a single 3D model without additional physical prototypes or studio sessions. While initial 3D model creation carries an upfront investment, subsequent renders for marketing campaigns, catalogs, or e-commerce listings are faster and cheaper to produce at scale. Automotive brands also benefit from being able to create marketing assets before a product physically exists, accelerating time-to-market.
What software and rendering engines do professionals use to create photorealistic automotive parts CGI with complex finishes?
Industry professionals commonly use 3D modeling software such as Autodesk Maya, Blender, or CINEMA 4D paired with high-end rendering engines like KeyShot, V-Ray, or Chaos Corona to produce photorealistic automotive part renders with complex finishes. KeyShot is particularly popular in product visualization for its real-time rendering capability and extensive material library that includes pre-built automotive paint, chrome, and carbon fibre shaders. For the highest level of photorealism, many studios use Unreal Engine 5 or Arnold, which support advanced ray tracing and physically accurate light simulation critical for demanding chrome and carbon fibre surface work.